Thursday, December 5, 2013

Quilted Christmas Stockings


To make these Christmas stockings, I followed a pattern from Moda Bakeshop. The pattern is "His and Her Scrappy Christmas Stockings" by Nicole Willmore. Click here to see the original free pattern.

I used her pattern, and adjusted it a bit. I wanted the stockings to be the exact same shape as the others that I already have, so I used my others as a template to draw up my own pattern, and used that for my four scrappy stockings. Years ago, I made six stockings for my family. As my kids have married, I knew that I wasn't going to go back and cross-stitch stockings for their spouses, so I wanted to come up with something else, and these scrappy stockings fit the bill. I like the idea of having the stockings being a little mix-and-match, so the fact that they are different designs from the originals doesn't bother me a bit. In fact I sortof like it... it seems to represent the phases our family has gone through.


You may notice the sad shape that my cutting board is in. It has some battle scars from previous projects (which may or may not have involved kids with markers). I have a newer one, but I love this little one that fits in the corner of my counter so well. So, ignore the scars and the marks. 

The Moda pattern is great to follow along with. I'll just add a few of my own photos here and some of the changes or adjustments I made. The original pattern makes two stockings. My stockings each measure about 16" long and 9-1/2" wide at the foot of the stocking.

On the Moda ingredient list, you'll notice that it uses a jelly roll. I found a fun Christmas-y one at our local quilt shop, and you can find others online at the Fat Quarter Shop. My jelly roll had enough fabric to make four stockings, plus I have scads left over that I can make a cute Christmas throw with. I went through all my fabric strips and laid out 12 (not 10, like the Moda pattern says) of my favorites, in the order that I wanted them on the stockings.


Once I had them in the right order, I cut each of the 44" strips in half so that they each measured 22". You'll only use 1/2 of each strip, so you can put away the others halves for another project.


Then, I took each 22" strip and cut a long diagonal along the long edge. I kept one end at 2-1/2 inches, and wedged it down to 1" on the other end.


Then, I sewed each of the strips together -- a wide end next to a narrow end, etc. This is where it becomes really scrappy. Don't worry about ends fitting perfectly, or if it looks a bit skeewompus. It will look fine when you continue on.


I ironed all of the seams flat and laid it on my piece of Warm and Natural (see original Moda pattern ingredient list).
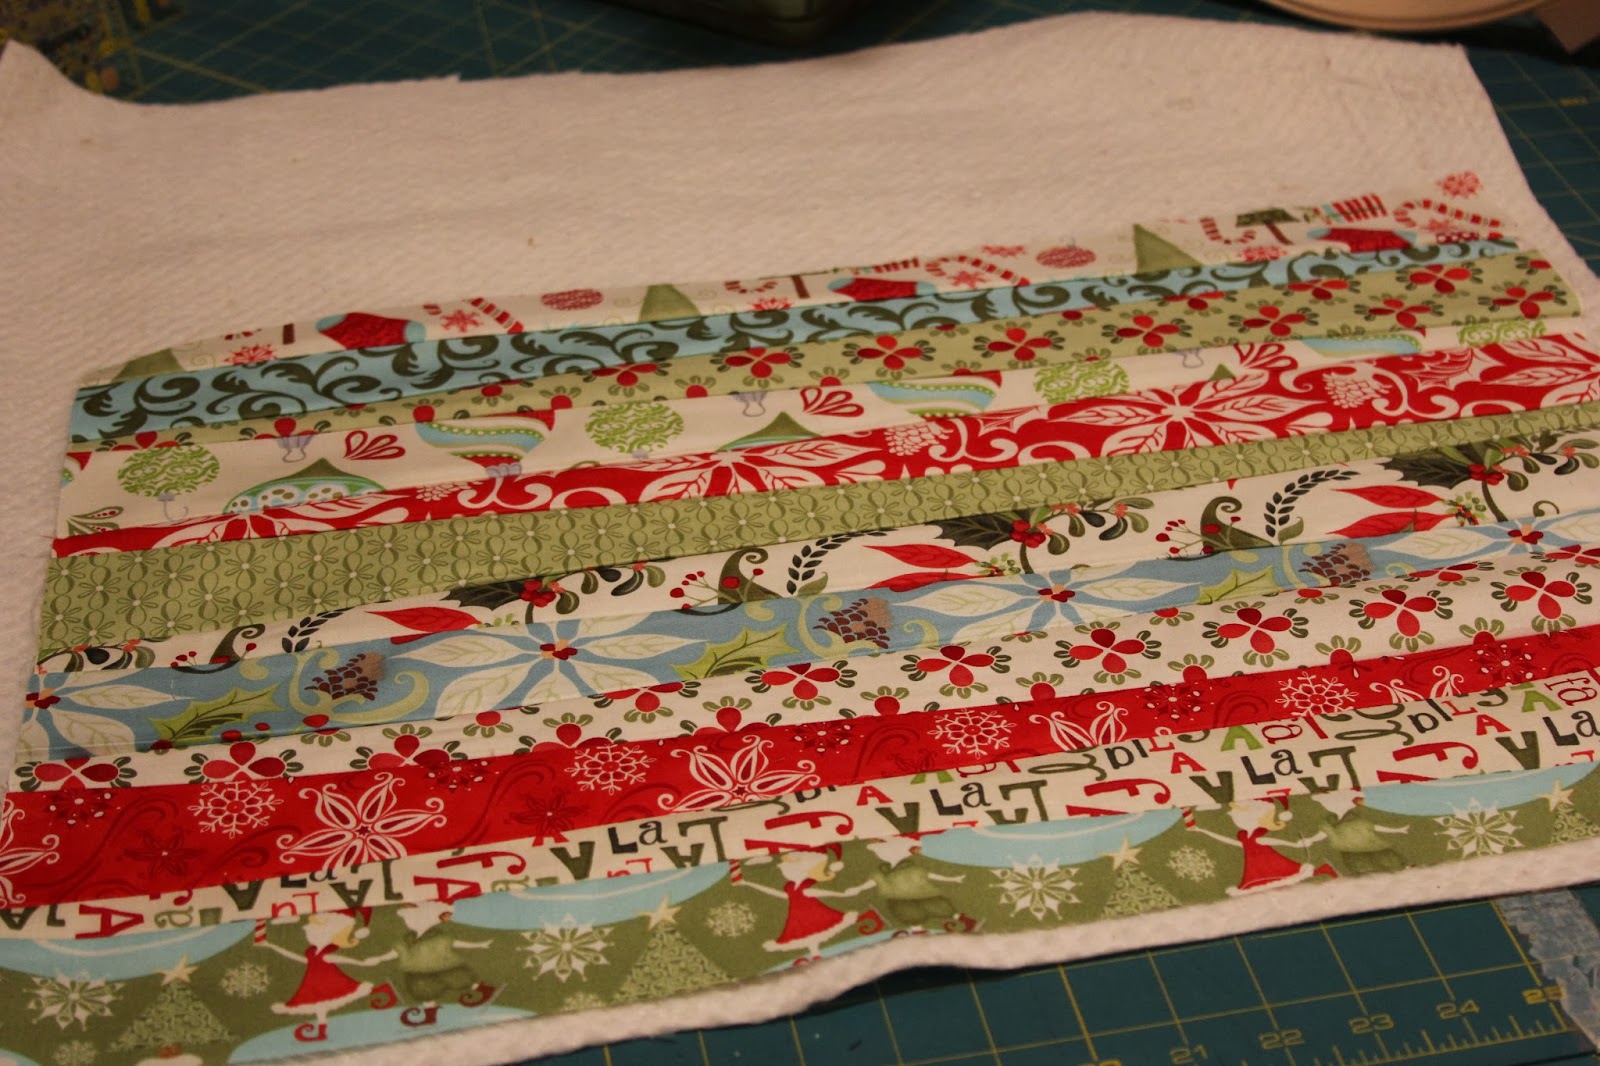

To attach it to the Warm and Natural batting, start with the bottom strip, and where there are seams, sew along them with any decorative stitch.


I then measured the quilted fabric and cut it in half, for the two stockings, making sure my stocking pattern would fit nicely on each side.


Now for the coordinating pieces of fabric (check the Moda pattern ingredient list). The layout is a little tricky to follow, but this is how I did it. First, I doubled over the end of the piece of fabric so that I could cut my two stocking lining pieces out.


After cutting out the lining pieces, I laid one more pattern out for the back of the stocking.


With the remainder of the fabric, I cut three more pieces: 7 x 13-1/2, 9 x 3-1/4, and 2-1/2 x 6. The larger of the three, the cuff piece, may change depending on the size of your stocking. I changed mine from the original pattern.


I took the medium-sized piece (9 x 3-1/4) and sewed that along the top of my quilted strips, right sides together. It won't match exactly with the rest of the strips, because of the scrappiness of the edges, but it will all work out in the end.


I ironed that top piece down and then laid out my stocking pattern, pinned it, and cut it out.


Then, I placed the stocking back on the stocking front (strippy piece), pinned them, and sewed them together, right sides facing each other.


I also sewed the stocking lining pieces together, right sides together, leaving about a 2" opening along the long straight edge of the stocking, for turning later. I trimmed and clipped the curves so that the stocking would turn easily, being really careful not to clip the seams.

To make the loop, I used the 2-1/2" x 6" piece of fabric. I folded it in half length-wise, and pressed. Then I unfolded it and folded the outside edges into the middle, and pressed again. I sewed along the entire long edge, using about 1/8" seam allowance.


Then, I took the large cuff piece and folded it in half and sewed the 7" edge, right sides together.


I turned half of it so that I had a cuff folded in half... like the picture below.


I placed the raw edge along the raw edge of the stocking at the top.


Then, I pinned it with the seam in the back, or along the seam of the stocking. To add the loop, I folded the loop fabric in half, centered it over the side seam, and then pinned.


Then, I placed the quilted stocking inside of the lining stocking and pinned all along the top, being careful to pin the loop exactly where it should be.


I sewed carefully along the top, and then pulled the quilted stocking through the opening of the lining stocking.


And end to end, this is what the stocking looks like. Sew along the lining opening to close the hole.


Push the lining stocking down into the quilted stocking, and iron flat.


And I embroidered the names on the cuff. The green ones below show my son-in-law's names embroidered on them, and the red ones had yet to be done in this photo.


And now, I need to come up with the grandchild version, which will be a little simpler (because I'm hoping for loads and loads of grandbabies, and I want to make sure I keep it easy enough to keep up with them! :)

Tuesday, December 3, 2013

December Week 1: Emergency lighting

This week's food storage items are:

December Week 1: Matches, 100 hour candles, 12 hour light sticks


This is one of those weeks where once you have it done, you shouldn't have to rotate or replenish it (as long as you haven't used any of your stock). 

The large can in the photo is one of two emergency cooking candles that I made years ago at homemaking night (that tells you how long ago it was). I wish I had the instructions, but I wasn't teaching the class, so I don't think we got the instructions. I can tell you that the candle is made of sawdust and wax (a messy process), and has a wick down the center of it. The theory is that you can use it to cook over in an emergency. I haven't had to use them yet, but they are there, waiting just in case!

The other items I have are the 100-hour candles from Emergency Essentials (on line). They are around $5.00, which seems pretty affordable for 100 hours of light. I'm pretty sure that in an emergency, I would pay the $5.00 to have light that I could rely on. I like the idea of having those around.

Don't forget the matches. Buy a few good-sized boxes and keep them with the candles on your emergency supply shelves.

I also have some light sticks. I think these might come in handy in a lot of different ways. These are also available at Emergency Essentials.

Since these are items that you won't rotate through, you'll need to think of them in a different way. How many do you think you'll need in an emergency situation? If you didn't have electricity for several days or weeks, what might you need on your shelves? It's difficult to guess, but at least get some of the items on your shelves, and you can add to them later on, if you feel the need. 

Now, I have seen a few other sources on Pinterest of ways to use household items as candles. This one, in particular, caught my eye. Since most of us have crayons somewhere in our homes, I thought this might be one to try out. In the particular Pin that I saw, it said that crayons will burn for 30 minutes. So, I figured it would be worth a try. I got a crayon, and secured it with a clothespin, and then put it in a pie tin.


It took a few tries to get it to light, but it finally did light. And the flame actually grew to about 6" in height.


Five minutes later, it went out in a flash.


So, if you are relying on crayons for your emergency light source, you may have to buy several boxes of them, since the flame only lasts for about 5 minutes.

I think I'll stick with the 100-hour candles. :)

If you would like the full info on the Week-By-Week Food Storage Plan, just click on the tab at the top of the page. You can then click on any single week and it will take you to the blogpost that featured that week's items. It also has the information as to how you can get a copy of the weekly schedule as well as the complete inventory sheets.

Thursday, November 28, 2013

Thanksgiving

Happy Thanksgiving!


I've mentioned how I love this holiday. It doesn't get much better than a holiday devoted to gratitude, blessings, family, and yummy food. This week of Thanksgiving, my heart has been full to overflowing. I lay in bed at night and think of the lists and lists of ways I've been blessed throughout my life.

I'm grateful for...

-our Savior, Jesus Christ and a loving Heavenly Father. Because literally without Them, none of the rest of this list would be possible. They make our daily happiness possible and a reality. I will spend my entire life doing my best to give back to Them.
-my husband. He completely understands me (no small feat) and is supportive of my every whim, and new idea. We LOVE the time we are able to be together. Love. I've talked about Bob's amazing talents and abilities quite a bit here. Suffice it to say, he is the strongest man in the world, spiritually, emotionally, physically, and mentally. And he brings such laughter and joy to our home.
-my four kids and their spouses. I can't say enough about our kids. They are literally the best! And how can we be so lucky to love every one of our sweet sons and daughters-in-law (including the sweetie that will be joining our family in March)? We consider that quite a blessing!
-our grandson, and another babe coming in March. Wow. Talk about one of the most amazing things that we've ever experienced... our hearts opening up wide and loving that little guy more than words can describe.
-work. How grateful I am that my husband has built a business (with his own smarts and determination and an incredible amount of hard work) that continues to support our family.
-my parents and sisters. I had an sweet, idyllic childhood with five of the most incredible sisters. And the best part is, we have continued to be great friends and love to be together. And you've heard me talk about my parents. They simply are the best!
-the world. Every time I go outside and look east, I stop and look at those beautiful mountains and almost gasp. And the beauty doesn't stop there. Everywhere I go, there are beautiful things to look at, whether it is here, locally, or in our amazing country (which I love to see), or in other countries. We are surrounded by lovely things.
-my health. How I hope I never take this for granted. We have known many in our lives who live with life-long health issues and others who have succumbed to illness and disease. Each day, as I get ready to go down and climb on the treadmill, I think about how some of our friends would do anything to be healthy enough to even walk on a treadmill, let alone run. I am truly grateful for my health.
-home. We have lived in a few different homes, some much smaller than others. And in every single one of them, we have been happy and cozy. A home truly is wherever your family lives. I love the feeling of walking in our home and feeling warm and safe and content.
-technology. My family will think I've lost my mind when they read that, because I usually do not express that sentiment about technology. BUT, I have to admit that without it, we wouldn't have access to so much. It is an amazing way to stay connected to each other.
-life. Life itself is the greatest gift. Every single day. There are miracles all around us, and such lovely things to be a part of as families and as individuals. Oh, what a blessing life is.


Tuesday, November 26, 2013

November Week 4: Potatoes

This week's food storage items are:

November Week 4: Potatoes: buds, pearls, scalloped, etc.


Let's first talk about long-term storage. The potato flakes you see in the can in the photo, are from the Family Home Storage Center, and I dry-packed them myself. They last 30+ years. You add milk, butter and salt, as well as hot water, but since I have all of those items in long-term storage, it should work out just fine. I like these potatoes really well, so we are able to use them in a pinch. But, since they have such a long shelf life, there really isn't much need to rotate through them at this point. You can order these by the 6-can case by clicking here.

The other package is also from the Family Home Storage Center, but these already have the milk and butter incorporated into them. You only have to add hot water to them. Since they have the fats in them, they have a much shorter shelf life. These generally last a year or so. That means that these ones I definitely have to rotate through. Again, they make a good mashed potato, and I generally would much rather whip up a batch of these than go through the rigors of making mashed potatoes from scratch. But that's just me.

Also, if you use any other sort of potato that is boxed, such as scalloped, this would be the time that you would re-stock your shelves. These have a shorter shelf life as well, so take that into consideration.

Now, decide your family's needs for potatoes. If you have a Family Home Storage Center nearby (to locate the Centers, click here), I would encourage you to make a visit. You can buy the instant potatoes there easily, and sometimes they even have some Potato Flakes canned and ready for the taking. Even if you have to can your own, it is a quick and fun process to learn. To see an order form of all that is available at the center when you visit, click here.

If you don't have access to a Center nearby, you can look into Emergency Essentials, or any other on-line provider of food storage items. I haven't ever ordered potatoes from any of them, so you're on your own with that venture.

Otherwise, you can do a shorter term storage and be sure to rotate through before they expire in a year's time. After you have your list of items to purchase, buy them the next time you are in a grocery store, and get the items on your shelves. Update your Inventory Sheets, and sit back and enjoy Thanksgiving with your family!

If you would like the full info on the Week-By-Week Food Storage Plan, just click on the tab at the top of the page. You can then click on any single week and it will take you to the blogpost that featured that week's items. It also has the information as to how you can get a copy of the weekly schedule as well as the complete inventory sheets.

Sunday, November 24, 2013

Thanksgiving Gratitude Book

This is an easy idea that will be a keepsake throughout time. We started a Thanksgiving Book a couple of years ago. Whoever is home for Thanksgiving that year can write what they're thankful for. Even in just a couple of short years, it is fun to be able to look back and see what was written. I covered a lined thesis book with scrapbook paper and photocopies of my old postcards. It didn't cost me anything, since I used supplies that I already had on hand. You could even use a binder, and then you can leave it plain or decorate it when you have a minute. The point is just to have something for everyone to write the things they are thankful for.


I'm excited for when our grandchildren can write (or draw pictures), and then they can write something in the book, too.


I think this year I'm going to add a photo of our family at the Thanksgiving table (and perhaps a photo or two from throughout the day.

I so love Thanksgiving. I love that it's a holiday based around gratitude, family, and yummy food. Its a beautiful holiday... Can't wait for Thursday!

Thursday, November 21, 2013

Activity Days: Gratitude and Thanksgiving

I was in charge of Activity Days a couple of weeks ago, and wanted to tie it in with Thanksgiving and Gratitude. For Activity Days (twice a month activities for girls ages 8-11), I feel like I need to be creative in incorporating one of the requirements, and in letting the girls make or do something. (Hence the term "Activity Days"). I have the younger ages, so they are the 8 and 9 year olds. They love to make things, and are excited about ANYTHING we plan. They are darling!

In my age group, we have three leaders, so we each take turns being in charge. It makes it a breeze, since it means we theoretically only have to be over an activity every six weeks. After serving in Young Women, where we have weekly activities, that is ever so easy. When it is our turn to be in charge, we have a scheduled topic from the book, and then we can choose any of the requirements and base an activity around that. My topic for my activity was "Serving Others".

Soooooo, I went to that section in the book, and scanned the various requirements. 


I decided this one worked great for this time of the year: "Write a letter to a teacher, your parents, or your grandparents telling them what you appreciate and respect about them".

So, we first talked about gratitude and what it means to be thankful.  I shared a couple of stories with them, and discussed them a bit, and then we moved on to making some cards.

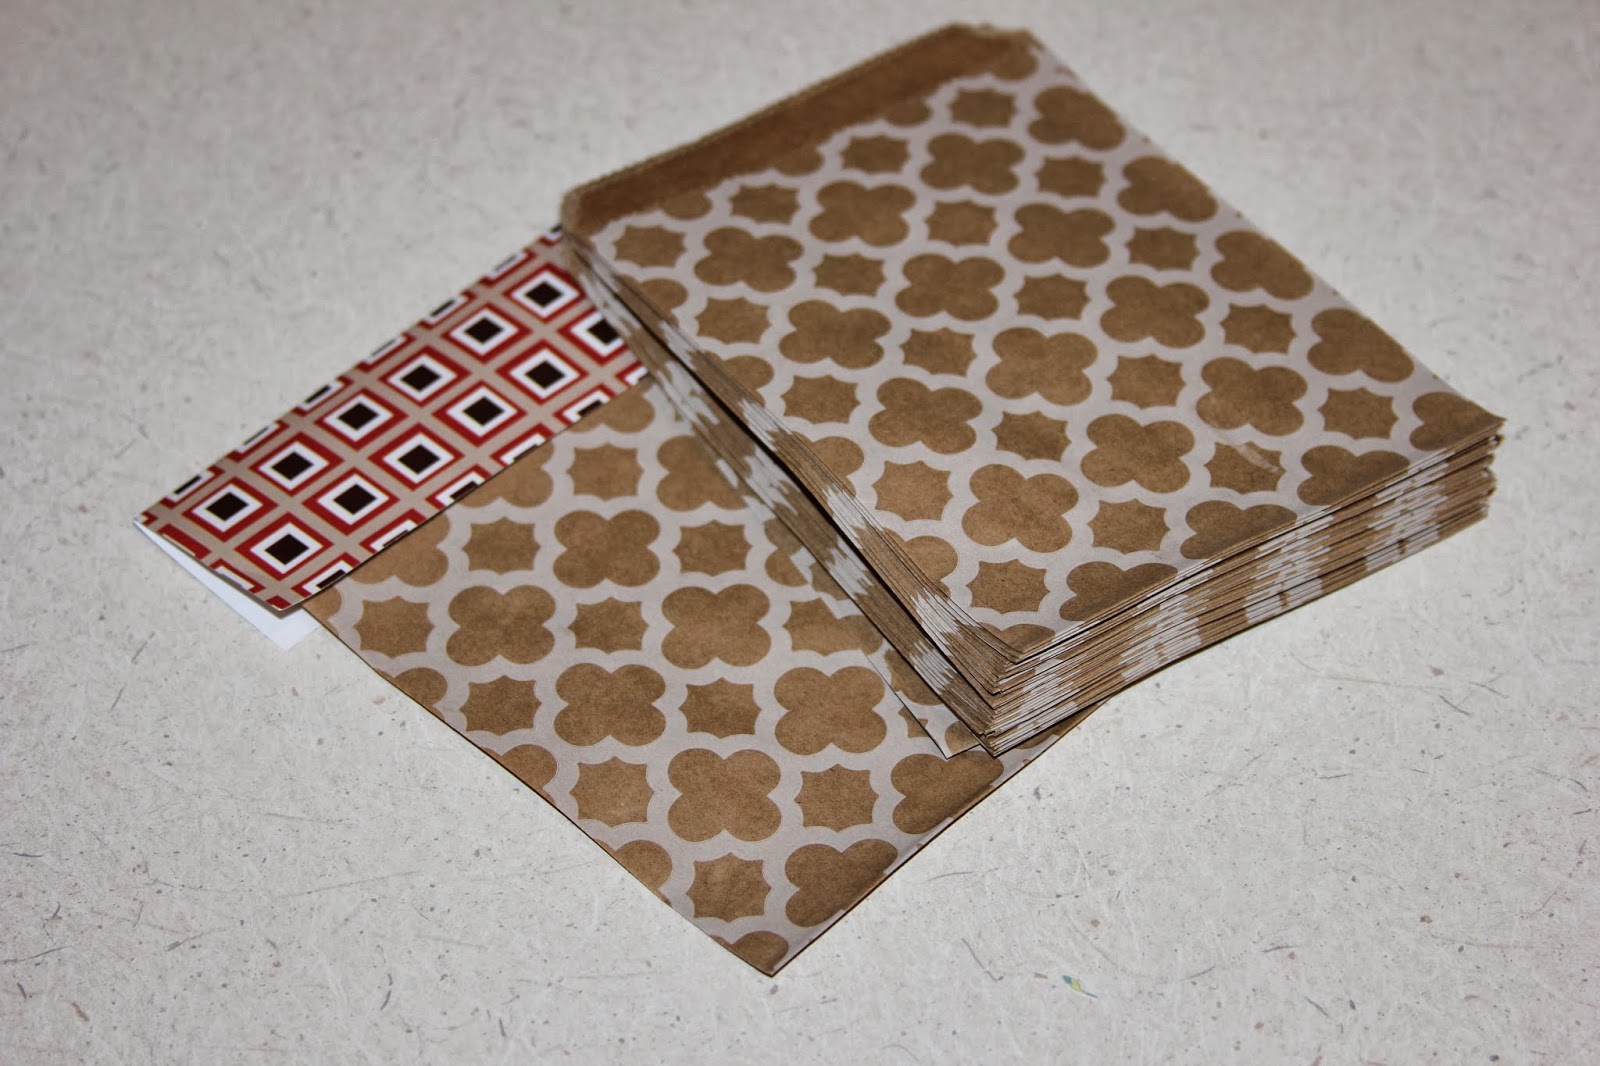
We started with this mat stack that I've had in my paper stash. Perfect size.


They each picked a couple of sheets from the stack so that they could make two cards. They folded the papers in half, and then glued this darling "Thankful and Blessed" graphic (go to nestofposies.com for the free printable) to the front. Then, they each wrote two different Gratitude Notes to two different people they were grateful for.


Then, of course we had to make a little treat to go with the note. I gathered a few supplies that I had on hand: baker's twine, treat bags, and extrenous treats from Halloween (okay... leftover candies, but it's not like they were the icky ones, or that they were a year old... heck, I would have loved to get that little sack of treats!)


They again chose some pages from the mat stack, and folded it in half the other way to make the bag topper. We stuffed the bags with candy bars and then stapled the topper to the top of the folded bag.


They punched a hole in the top of the bag topper and also the card, and attached the card to the bag, leaving a nice long loop at the top...


... so that they could put the treat on someone's door and leave it for them to find. What a fun surprise! I don't know if the girls believed me when I told them, that even though the treat was fun, the best part of that little package were the cards that they so painstakingly wrote expressing their gratitude. What treasures!

Tuesday, November 19, 2013

November Week 3: Rolled oats, oatmeal, cornmeal, cream of wheat, boxed cereal

This week's food storage items are:

November Week 3: Rolled oats, oatmeal, cornmeal, cream of wheat, boxed cereal


For this week, try to consider all of the cereal items you use, as well as cornmeal. There will likely be some that you use for breakfast, but also think about the cookies and baking you do. How much of these items would you go through in a year's time? Just make an estimation, and make a list. Do you already have some of these things in storage? If so, take that into consideration, and adjust your list accordingly. Now you have a shopping list of what you will need this week. In the next couple of days, make a point to go to a grocery store where you can pick up the things you need. After you bring them home, update your Inventory Sheets and get the items on your food storage shelves. Woo hoo! You are done for this week, and you are one week closer to having what your family will need for their food storage.

Now, if oats are packaged for long-term storage (like at the dry-pack cannery), then they can stay good for 30+ years! So, that means that you can have some long-term oats on the shelves, as well as some that you can rotate through for the next year. This is a food storage system that is meant for rotation. As I've mentioned before, I hate to throw away food storage that has gone bad. It feels like such a waste, and then it doesn't get me that excited about replacing it, UNLESS I rotate through the food and use what I am storing. If you check your shelves before you go grocery shopping, you can easily rotate through what you already have. That's why I like to have a little more than a year's supply of most items... so that when I get to the end of my year of "rolled oats", say, then I'm not completely out, but have some to get me by til my shelves are replenished.

Be sure to look at dates on your packages. Many cereals don't have a long shelf life, so work that into your plan.

You could also fill your shelves with everything BUT cold cereal, which is what I do. We don't eat enough of it for me to be concerned about putting it on my inventory sheet, but if you feel that's an item you want to keep track of, then add it to your sheet.

If you would like the full info on the Week-By-Week Food Storage Plan, just click on the tab at the top of the page. You can then click on any single week and it will take you to the blogpost that featured that week's items. It also has the information as to how you can get a copy of the weekly schedule as well as the complete inventory sheets.