Showing posts with label quilts. Show all posts

Friday, May 8, 2015

Last of the Baby Quilts

I've finished with this round of baby quilts. We had five grandbabies born in 2-1/2 months time, so I had a few to get done in a fairly short amount of time.

I posted earlier, about how I'm doing the strip quilt method for all of them so that they are similar to each other, but different fabrics. (To read that tutorial, click here) This is also a pretty quick quilt to work up, so it's do-able, even when there are five to make!

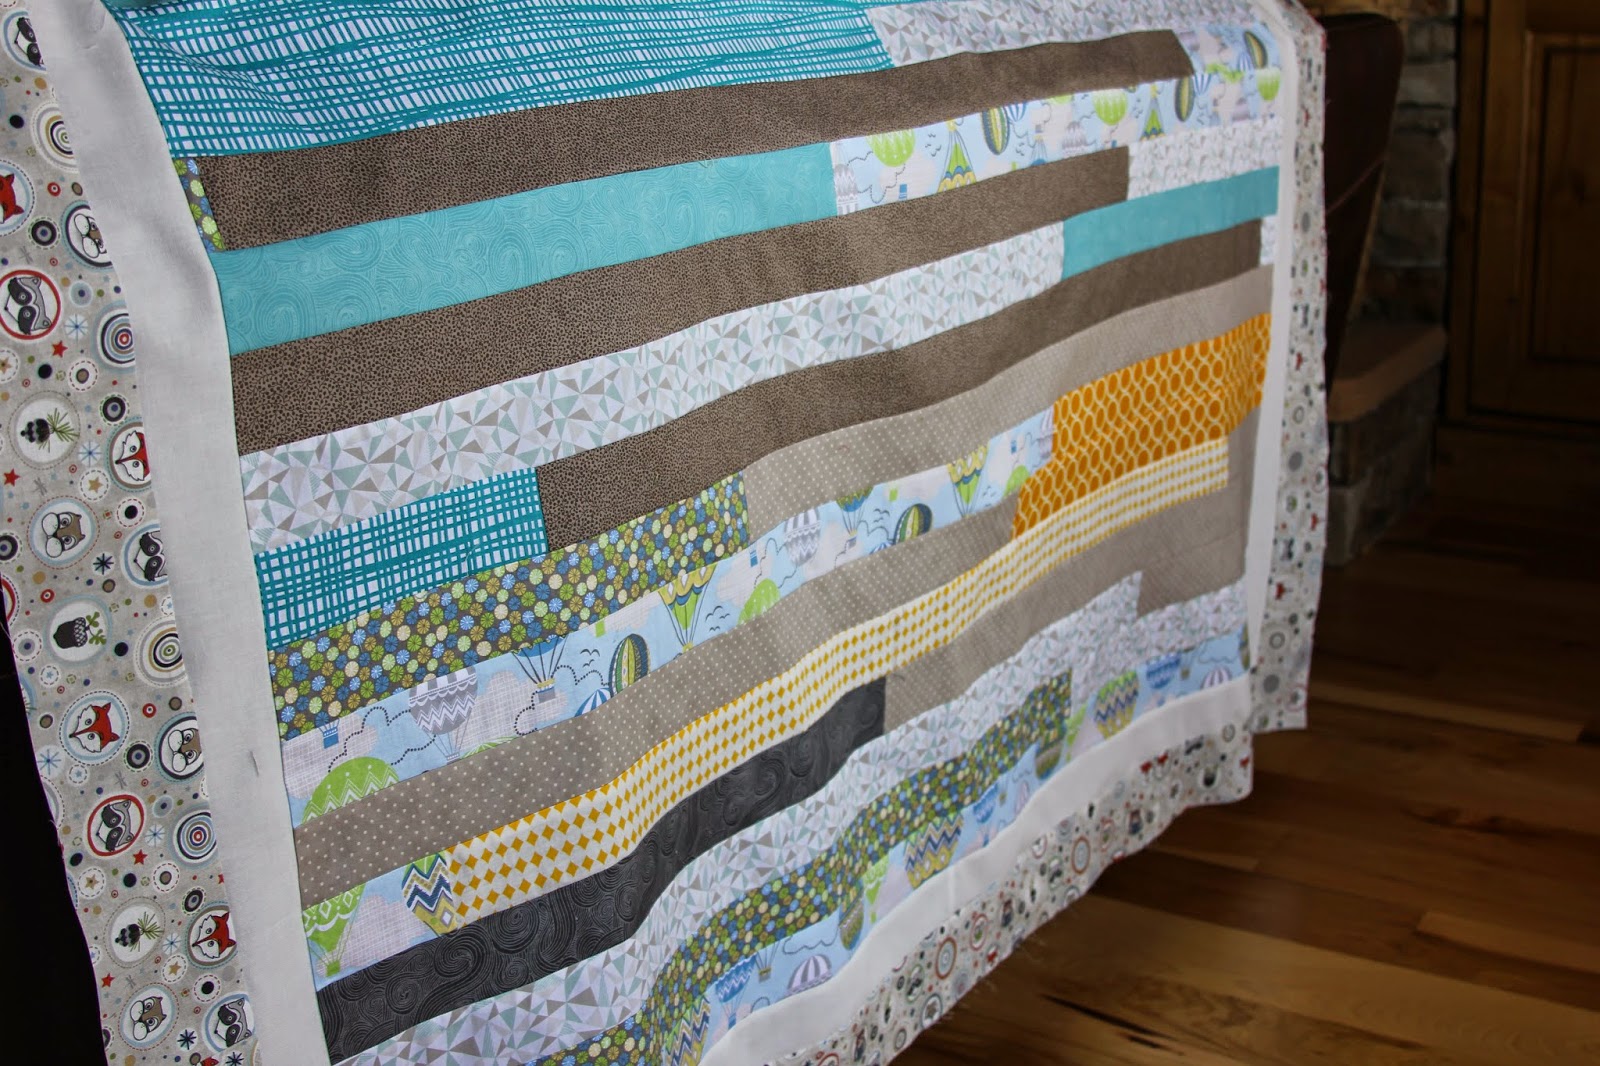
This is the one for Margo...


I add a quilt tag on the back of all of them with their name, the year, and that it's from Grandma and Grandpa (I do the sewing, he pays for the materials. :) )


And this one is for our youngest (just 6 weeks-ish old), Pi.


And just for good measure, I made one for our cabin. Actually, I had a jelly roll (a roll of fabric strips) sitting around and thought I might as well sew it up for a throw, and it reminds me a bit of the cabin.


And there you have it. Done for now. :)

Friday, February 6, 2015

Two More Jelly Roll Quilts Delivered

I've delivered the first of our grand baby quilts for the year. It was so much fun to do the quilts for the twins. They're very similar, but have a few subtle differences. 


The backs are slightly different, along with one of the border fabrics.


Gotta love those jelly roll quilts. (To read more about how to make jelly roll quilts, click here) It was a good way for me to go so that all of my grandkids have the same basic quilt design, but very different with the use of different fabrics. And there are such cute jelly roll fabrics out there. I've got several rolls on my shelf just waiting to be made. The first ones to be finished though, will be the three for our other three new grandbabies. 

For those who are wondering what the count is to date, we have 5 here, with one due any day and another due in a couple of months. We are beyond thrilled to have so many new ones so close together (five in three months time!). Our family is growing so quickly. Bob and I spent most of January visiting or babysitting grand kids. And I've gotta say, we couldn't think of anything that would bring us any more pure joy. It has been like a slice of heaven around here.

Thursday, October 30, 2014

Quick and Snuggly Baby Blanket

We make a lot of baby blankets around here. We love to visit the new mommies in the neighborhood and give them a little blanket for their newborn. It's a wonderful way to get to visit with people, and best of all... we get to see and hold the new wee ones!

I've gone through a few different versions of baby blankets, and I think I've found the one that we'll stick with. It's cozy, soft and simple. And it's warm, but still easy to fit into a diaper bag. Sometimes those big puffy quilts are just a little hard to pack around with you.


Basically, to make these baby blankets, you will start with a yard and a half of a cute printed cotton fabric. And also a yard and a half of a coordinating minky fabric. Wash and dry both pieces of fabric first. Very important to pre-shrink so that you don't have any of that happening afterwards. The two pieces of fabric will likely shrink at different rates, so that would make for a mess of a blanket if you didn't pre-shrink. After the fabric has been washed and dried, square up the cotton fabric so that the edges are all nice and straight and square. Lay the cotton fabric on a large flat surface, with the right side (print-side) facing down. Take your piece of minky, and lay it on top of the cotton fabric, right side up. Try to get one of the straight, factory edges of the minky lined up with at least one of the edges of the cotton fabric. Because of the usual width of the minky fabrics, you will have a good amount of excess. Smooth the wrinkles in the minky, so it's all nice and smooth. Then, cut the minky 1-1/2" smaller than the cotton fabric, on all sides.


After you've trimmed your minky to size, you will fold all of your cotton edges over the minky.


I fold it once, about 3/4 of the way to the minky, and then fold it once more, over the edge and onto the minky. And then pin. And I mean pin. Pin often, like every 2 inches. I know this sounds like overkill, but minky moves and slips a lot. If you don't pin often, you may have some slippage, and your blanket could be a bit skeewampus (if I can borrow that technical term from my dad).


When it comes to the corners, fold up the corner edge into a little triangle, and then fold up the rest of the edging, just as you've been doing, and continue on down the side of the quilt. Hard to explain, but look at the photo below for an idea of what I'm talking about. And don't forget to pin the corner down well.


And now for the sewing. Use a straight stitch and sew all the way around the fabric, fairly close to the edge of the pinned fabric. Take your time, and keep an eye on your presser foot so that your edge is about the same all the way around.


And voila! You are done. Easy as pie. In fact, I like to make several at a time, assembly-line fashion. It doesn't take that much longer to make more than one.


The possibilities are endless. I always find my pieces of cotton fabric first, and then find a minky to match. There are so many darling fabrics out there... makes it hard to choose!


I like to keep a stack of boys and girls quilts at the ready, so that whenever we have a minute to make a visit, I've got a blanket to take.

Saturday, September 27, 2014

Jelly Roll Jam Strip Quilts Label and Binding

A few weeks ago, I posted the fun easy way to make Jelly Roll Quilts. To see that post, click here.

After the jelly roll strip quilt has been quilted (either by hand or by machine), trim the edges all nice and even. At this point it would generally be time for binding, but I decided I wanted to put a label on my grandbabies' quilts, so they would always know who made it for them and when it was made. Furthermore, I decided I wanted to have the quilts be from both Bob and I since he provided the money in our bank account for the materials, and I provided the labor -- a perfect working team! 


To make the label, I just cut a square out of an off-white fabric. Then, I folded it in half and wrote on it with a Pigma Micron Pen. Just a note about Pigma Pens. I LOVE them. Does that sound over-dramatic? It may sound that way, but I have used them for years and years, and they are always my go to pen. They don't bleed on fabric, they have a nice, precise point, and they are permanent. Perfect, I tell you!

After pinning the piece of fabric in place, as in the above label, it is then time to bind the quilt. There are many different philosophies to binding. To me, there is no better finished look than hand binding. It is a beautiful way to finish the quilt, and all of the stitches are hidden. When I make a quilt that is a keepsake quilt, I hand-bind. Having said that, there is also a time and a place for machine binding, in my book. And these baby quilts are the time and place. I want these to be quilts that they use, and therefore they must be able to be thrown in the washing machine. So, machine binding it is. It will hold together well through wash after wash after wash... and also through little kiddos dragging the blanket around wherever they go. 

I could show you photo after photo of the binding process, but then I would probably be pretty much copying the directions from someone else's website, since that is what I looked at for these particular quilts. So, instead, I will refer you to Cluck Cluck Sew, a terrific website devoted to quilting and sewing. Click here to see their machine binding tutorial.


After binding the quilt, this is what the finished product will look like.


As a side note, when I got them machine-quilted, there were hundreds of designs to choose from. My grandson loves foxes, so I had his quilt quilted in a forest animals pattern. You can see an owl, and an acorn in the photo below. There is also a fox somewhere in there.


And for my granddaughter, the quilt had big loopy flowers, which are adorable.


I love how the quilts turned out. They were fast, simple projects, and very do-able. Especially considering the five more I need to make for the five additional grandbabies coming our way.


Thursday, September 25, 2014

Some really, really big news.... times 5!

I mentioned in a previous post that I got caught up with my first two grandbabies' baby quilts, which is awesome and makes me feel so very good. But then, we got this photo over GroupMe...

Shoes: Daddy's, Mommy's, Big Brother's, and Baby-To-Be

Woohoo! Our daughter and her husband are expecting their second child!

And then, our youngest son and his wife told us that they are expecting. Yay!!!! We were beside ourselves with the excitement.

You're going to need to sit down somewhere in this story. Probably now.

Our other daughter came over a few weeks after that, and as we were holding her little baby, we happened to read a little sign hidden under her bibdana.


Yep. She is going to be a big sister... only 13 months older than her little brother or sister!

Seriously. If you haven't found a seat yet, find one. It just keeps getting better. Just when we thought we couldn't contain any more excitement, our oldest son and his wife gave us the amazing news that they are expecting.... twins!!!!

So, if you're keeping track, that means ALL FOUR of our kids are expecting babies!  All five babies will be born within about three months of each other! Can you believe that? It makes me smile so often throughout the day. Really, really smile. I love thinking about those babies joining our other two grandbabies. Oh how we love our grandkids around here! They are the light of our life. There is no other way to say it. We are so thrilled! And the mommies are all darling and so ready for these babies. I love to think about the five little cousins growing up together. Fun times ahead!

I realize that there are a plethora of exclamation points in this post, but can you blame me?

And now, since I've got five more grandbabies coming, and they'll be in dire need of a baby quilt, I've got to get crackalacking on some quilts. I've started working on them for the first two babies (expected in January and February), who we know are girls. Remember in a post a few weeks ago, I mentioned that I had decided on a simple quilt idea for the two grandbabies we are lucky enough to have so far (click here to see how I made the jelly roll jam quilts). And now you can understand why the quilt pattern needs to be simple. :) I'll be posting the finishing instructions for the quilts (binding and label) in my next post, so check back for that.

Til then, you'll find me smiling....

Thursday, August 28, 2014

Jelly Roll Jam Baby Quilts

Necessity is the mother of invention. Truer words were never spoken. When our first grand baby was born a year and a half ago, I decided I would make each of my grand babies a quilt sometime in their first year of life. I went to the quilt shop, found a pattern I liked for our grandson, bought the fabric, and then it sat in a nice stack in my quilting room. And since my craft room was in complete upheaval at the time, it sort of got shifted around along with several other stacks of things to do. Then came grand baby #2... a granddaughter this time. And I bought a pattern and fabric for her, too. Fast forward a year or so, to when I cleaned my craft room out and totally reorganized it. And suddenly my projects were all staring at me from my "project shelves". I knew I needed to get to these baby quilts. Then grand babies #3 & #4 were announced. Alrighty then. Plan B. Can I tell you how much I love Plan B? I had seen the online hullabaloo about the "Jelly Roll Jam" quilts, and I knew this was what I wanted to do for ALL of my grand baby quilts. I thought it would be so cute to have the same basic quilt pattern, but different fabrics for each grand baby.  And it didn't hurt that the quilts were a snap to put together. Some ladies put them together in 45 minutes. I'm not that fast yet, but it definitely takes under 2 hours, which is amazing!

To begin with, for my quilting projects, I always use a 1/4" quilting foot on my sewing machine. That way I can sew with my quilting foot along the edge of my fabric and know that I'm always sewing a 1/4" seam.

For this quilt project, you will need the following:

-40 strip jelly roll (see photo below), or enough different types of coordinating fabrics to cut 40  2-1/2" (by the width of the fabric: about 44") strips from.
-3/4 yard of fabric for inner border, cut into 6  2-1/2" strips by the width of the fabric (44")
-1 yard of fabric for outer border, cut into 7  3-1/2" strips by the width of the fabric (44")
-4 yards of fabric for the quilt back
-quilt batting (for the size of the finished quilt top)
-1 yard of fabric for the binding, cut into 2-1/2" strips by the width of the fabric (44"). Before buying this, read through this whole post. I generally have enough leftover fabric from my backing fabric for the binding strips.

Remember, I didn't have jelly rolls for the first two quilts. I had already bought the fabric for them, and still wanted to use that fabric. So, I made my own jelly rolls. Now, you may be wondering what a jelly roll is. It looks like the photo below, and is usually made up of 40 2-1/2" x 44" strips.


Very handy that it is already cut into the size I will be working with in my baby quilts to come. But for now, I had to cut my own, which wasn't really that big of a deal. I just laid my fabric out, and cut it into strips that were 2-1/2" wide by the total width of the fabric (44").


After I had 40 strips cut, this is what my piles looked like.


Next, I thought I would space them all out so that the fabrics were spread out. It turns out this doesn't make any difference, and may also end up having just the opposite effect of what I was hoping. In a jelly roll, the fabrics all come layered with the same colored of fabrics all together. When you open up a jelly roll to use for this quilt, keep the layers exactly as they came. Don't try to manipulate them like I did. It works much better to keep them as they are. I promise.


Below is a jelly roll that I opened and left in the order it came in. Leave it in the order it came in. 


The next step is to cut all of the selvage edges off. I've cut off half of them in the photo below.


And now, it's time to get started sewing. Before you even begin, load up 5 bobbins so that you won't have to stop and wind bobbins mid-way through your project. You'll be happy you did. Now take the first strip and cut 18" off of it. This way, your seems will end up being more varied throughout the quilt. Sew the first strip to the second strip (on the 2-1/2" ends), right sides together. Easy peasy.


Now, to save time and thread, don't break your thread when you come to the end of that first seam. Bring up the tail of the second strip up and lay it on your sewing machine, right side up. Lay the third strip on top of that, and sew together.


Continue on til all of your strips are sewn together.


Cut the threads between the strips. You will have one long strip in a big pile (about 1700" worth of a long strip!). Find the two ends.


Begin sewing the two ends together (be sure the right sides are together), along the whole length of that super long strip.


When you are getting towards the end of sewing that long seam, you will probably have something that looks like the photo below. No worries.


Just make a cut in the end of the strip, and the ends will fall together nicely for you to be able to finish sewing your strip.


You can trim it up evenly after you've finished sewing all the way to the end of the strip.

Now, you'll have a double wide strip that is half as long as the first one you made. Take the two ends of the double-wide strip and begin sewing them together (right sides together) along the long edge. As you sew over your seams, lay the seams towards the darker piece of fabric.


When you come to the end, you may have it work out perfectly, or you may have it twisted. It doesn't matter. You will clip the end either way before you sew all the way to the end.


Now continue on with your quadruple-wide strip. And follow the same instructions.


Continue until you've got your quilt at approximately 54" X 64". At that point, I added a couple of borders to frame it off. My inner border used strips that were 2-1/2" wide, and my outer border strips were 3-1/2" wide. I measured the length and width of the finished strip quilt, and then multiplied that number by two, and added 15". I cut the 2-1/2" strips that I would need, and then sewed them all together in one long border strip. I then sewed the border strip onto one side of the quilt, and trimmed it at the end of the quilt. Then I sewed the border to the other side doing the same thing. After the sides were complete, I sewed the strip along the entire top and bottom using the same method. To do the outer border, I followed the exact same steps as the inner border, but used the 3-1/2" wide strips.

After the quilt top was finished, I ironed the back laying the seams down in preparation for quilting. (And yes... the fabric is different in this photo below. This is the quilt for my granddaughter)


These next two photos are the finished flimsies. This is before I took them to the quilter to have them quilted.


The strips will all be layered randomly in your finished quilt. You'll end up with some of the same together, and most not. The above quilt is the one I tried to manipulate by putting the strips in a certain order so that the colors would be all spread out. The bottom one is one I sewed together in the piles of strips as they were, without spreading the colors around evenly. They are a bit different from each other, but they both ended up being fine.


At this point, measure your finished quilt top. Then, find a backing that coordinates with the colors of your quilt top. You'll need about 4 yards of the fabric for the back. You can cut your four yards into two yard pieces, and then sew them together along the selvage. (Don't forget to iron down the seam on that backing piece) And now you will have a backing that is a bit oversized for your quilt top. I take it that way to the quilt shop to be machine quilted, and after they've quilted it, I cut the excess backing fabric off, and I have enough of that to cut the binding strips. The reason I like the machine quilt shop for these, is I want these to be machine washable for many years to come, and I also wanted them done quickly, sooooo the machine quilter was the ticket. And when I take it there, they use their own batting, so that eliminates me having to go and purchase batting. Yay! 
Next week, I'll post about the finishing the quilt... trimming, the quilt label and also information for the binding. (Click here for more information on the binding and quilt labels)