
Thursday, January 29, 2015
72-Hour Kit Reminder
Quick reminder to work on those 72-hour kits! We'll be working on the next task next week, so click the 72-hour kit tab above, and see what we've done thus far.

Tuesday, January 27, 2015
January Week 4: Paper Supplies
How is your week-by-week food storage going so far? Again, don't get discouraged if you fall behind a week or two... just pick up with whatever calendar week we're currently on. You can always pick up the missed weeks later on, or next year, when they come back up in the schedule. Its just good to keep on working on whatever you can!

This week we're on January Week 4. The items to collect and store this week are as follows:
| January Week 4: Paper supplies: paper towels, paper plates, paper cups, plastic utensils, napkins, Kleenex, toilet paper |

Store the items you will need on hand for the upcoming year. Weigh each item as to what your family would use, but keep in mind that long-term emergencies may require some different items than what you would normally use. If you don't really use paper towels, you probably won't need many rolls, but you may want to consider storing some (because they may come in handy for some emergency use). Same with paper plates, cups and utensils.
If storing a whole year's supply of toilet paper seems overwhelming, just buy a few large packages and start with that. You can add to your stockpile later on, but get at least a few of everything in storage!
Once you're decided on amounts of each item that you'll need for the week, add them to your shopping list, and get to the store in the next day or two. Get the items home, and on the shelves and update your inventory list.
One thing that is nice, is that once you've collected these items, you don't necessarily have to rotate through them, which means next year, you wouldn't need to buy anything additional this particular week. Sometimes I will run out of something and run down to get a box of Kleenex or some napkins, or something. If I don't get around to replacing it, I know that next year, when I go through the inventory, it will show that I'm one package down from what I should have, and I'll know I need to restock on one or two of the items.
Once you're decided on amounts of each item that you'll need for the week, add them to your shopping list, and get to the store in the next day or two. Get the items home, and on the shelves and update your inventory list.
One thing that is nice, is that once you've collected these items, you don't necessarily have to rotate through them, which means next year, you wouldn't need to buy anything additional this particular week. Sometimes I will run out of something and run down to get a box of Kleenex or some napkins, or something. If I don't get around to replacing it, I know that next year, when I go through the inventory, it will show that I'm one package down from what I should have, and I'll know I need to restock on one or two of the items.
So, now we are done with January! To go back and review what January's items are, go to the "Week-by-Week Food Storage Plan" tab.
If you would like the full info on the Week-By-Week Food Storage Plan, just click on the tab at the top of the page. You can then click on any single week and it will take you to the blogpost that featured that week's items. It also has the information as to how you can get a copy of the weekly schedule as well as the complete inventory sheets.
If you would like the full info on the Week-By-Week Food Storage Plan, just click on the tab at the top of the page. You can then click on any single week and it will take you to the blogpost that featured that week's items. It also has the information as to how you can get a copy of the weekly schedule as well as the complete inventory sheets.
Friday, January 23, 2015
Cutting a Window in the Playroom Wall
I know many of you may wince when you think of cutting holes in perfectly good walls. But this was one of those times when it was needed.
We've been working on our playroom, which is specifically for our grand babies (5 here, two more on the way!). It is a slow work in progress, but at least we keep progressing. Our most recent improvement was to make our window in the wall of the little closet. This room used to be our oldest son's room, and he had a regular clothes closet, but then also had a little closet that was framed in under the roof line. We used it for storage of all kinds of odds and ends through the years, and when it was emptied out, it felt like the perfect place for a little playhouse!
The rest of the playroom is mostly done, so we've been turning our sights on the playhouse now. We put in a wood floor, and have plans to make a little kitchen in there, too. It gets a little cavernous in there, so we decided a window would be just the ticket.
We had to decide on the perfect height for our little ones, and then drew the outline of our window on the wall.


And there is always patching to be done after that. So, I got our paintable caulk out, and went to work.


We've been working on our playroom, which is specifically for our grand babies (5 here, two more on the way!). It is a slow work in progress, but at least we keep progressing. Our most recent improvement was to make our window in the wall of the little closet. This room used to be our oldest son's room, and he had a regular clothes closet, but then also had a little closet that was framed in under the roof line. We used it for storage of all kinds of odds and ends through the years, and when it was emptied out, it felt like the perfect place for a little playhouse!
The rest of the playroom is mostly done, so we've been turning our sights on the playhouse now. We put in a wood floor, and have plans to make a little kitchen in there, too. It gets a little cavernous in there, so we decided a window would be just the ticket.
We had to decide on the perfect height for our little ones, and then drew the outline of our window on the wall.
There was some electrical going on in that space, and also a probable load-bearing wall, so we took all of that into consideration. And remember, when I say "we", I really mean Bob, with me on the sidelines cheering.
After he had both sides of the sheet rock removed, he was left with what was in the photo below.
He carefully cut the boards out, moved the electrical to below the window sill...
... and then framed in a header for support, and re-framed the window all the way around.
After that, it was my turn. I taped and patched the sheet rock to cover the screw holes and the areas that we had to add sheet rock to.
A new coat of paint, and no one's the wiser.
After painting, Bob put in the finishing MDF boards to frame the window.
And there is always patching to be done after that. So, I got our paintable caulk out, and went to work.
This is the same corner, after caulk.
A few coats of paint on the window frame, and then some curtains, and we can check that project off the list!
I envision puppet shows happening from inside this window, in addition to hours and hours of playing house. Can't wait!
Tuesday, January 20, 2015
January Week 3: Medications
This week's food storage item is below, highlighted in pink. We are in the third week of January. To find the original plan and the prior weeks, click the tab above that is marked "Week By Week Food Storage Plan"
As with other weeks, you can assess what you want to store, and go as basic or complete as you desire. For my family, I have a bottle or package of each of the medications. I keep them in a container up on a shelf in our food storage room and I rotate them into regular use. Today, when I did my inventory of those supplies, I took the medications that were going to expire this year out of the container, and put them on my regular medicine shelf in my kitchen so that we'll use them. I also wrote those same medications on my shopping list for this week, and I'll get them back up on the food storage shelf and "inventoried" as soon as I have a chance to pick them up from the store.
January Week 3: Medicines: Excedrin, aspirin, Advil, Pepto Bismol, cough drops, Tums... whatever YOUR family will need as far as medications in the coming year.
 |
| January: Week 3 |
As with other weeks, you can assess what you want to store, and go as basic or complete as you desire. For my family, I have a bottle or package of each of the medications. I keep them in a container up on a shelf in our food storage room and I rotate them into regular use. Today, when I did my inventory of those supplies, I took the medications that were going to expire this year out of the container, and put them on my regular medicine shelf in my kitchen so that we'll use them. I also wrote those same medications on my shopping list for this week, and I'll get them back up on the food storage shelf and "inventoried" as soon as I have a chance to pick them up from the store.
Keep in mind that some weeks there won't be anything to "re-buy" since not everything expires every year, AND since there are many items on the list that never expire.
If you get busy and find yourself behind on the lists, just pick up wherever you are and start again. The point is to just keep on working on having things in supply, and ANYTHING is better than NOTHING.
Once you have this system in place, it shouldn't take more than ten minutes a week to maintain it.
If you would like the full info on the Week-By-Week Food Storage Plan, just click on the tab at the top of the page. You can then click on any single week and it will take you to the blogpost that featured that week's items. It also has the information as to how you can get a copy of the weekly schedule as well as the complete inventory sheets.
Once you have this system in place, it shouldn't take more than ten minutes a week to maintain it.
If you would like the full info on the Week-By-Week Food Storage Plan, just click on the tab at the top of the page. You can then click on any single week and it will take you to the blogpost that featured that week's items. It also has the information as to how you can get a copy of the weekly schedule as well as the complete inventory sheets.
Saturday, January 17, 2015
72 Hour Kits: Task 5 - Water Systems, etc
To check out the previous 4 tasks, click on the 72-Hour Kit tab above.
These items all fit nicely into my rolling cooler. I have mentioned before that I have three different types of bags/buckets/carriers that my 72-hour kit fits into. Each carrier has a different purpose, and can be used in an emergency. You will come up with something that works best for you, which may be completely different than what works for me. Just find your method, and get cracking.
Today's task is the water-related items. We've already stowed water (in Task 4), so we won't talk about water today, but there are a few more items that we need to cover:
1. water purification tablets. These are easy to store, so it always makes sense to me to have a supply of them somewhere in your emergency supply. You can find these at a variety of stores and online shops. I like the Katadyn Micropur Purification Tablets, found here. By the way, these have an expiration date. So, on your 72-hour kit checklist, be sure to note the expiration date. Remember that after the 72-hour kit is complete, you'll just be looking at your list once a year, and removing the items that expire that year, and replacing them with new.
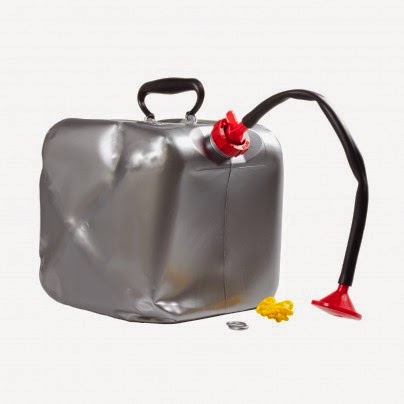
2. collapsible water bag. These come in all shapes and sizes and types. There are even some that have a filter as part of the spigot, which would be so handy. Think emergency. 72-hour kit kind of emergency. If you had to find water from another source other than your home emergency supply, you might need a convenient carrier, and these store in a very small amount of space.
3. water filtration system. Again, there are a bazillion of these on the market, and they just keep on coming out with better (and smaller) systems. Shop around, but be sure to get something that you can filter water through.
4. solar shower. This isn't completely necessary. Or is it? The one I have is compact, fits in my kit, and I believe it would feel like it was heaven-sent after 24 or 48 or 72 hours of not having a shower. And this little beauty is under $15.00. It is perfect for a emergency shower.
 |
| Image from Beprepared.com |
These items all fit nicely into my rolling cooler. I have mentioned before that I have three different types of bags/buckets/carriers that my 72-hour kit fits into. Each carrier has a different purpose, and can be used in an emergency. You will come up with something that works best for you, which may be completely different than what works for me. Just find your method, and get cracking.
Start working on today's Task 5 as soon as you can. We'll give you til the end of the month, and then we'll start with Task 6. Some may think that this is far too drawn-out for a 72-hour kit plan, but it seems much more do-able in small chunks. And it's much better than doing nothing at all. So, keep moving along. In no time at all, you'll have that 72-hour kit that has been on your To Do list forever. Yay!
Friday, January 16, 2015
Cleaning out My Holiday Closet... Finally Done!
I can finally declare myself done with going through my Christmas decor (from 30 years of collecting). I feel so accomplished. It has taken me years and years to really do it. I've needed to go through each and every box, but somehow when it came time to take the decorations down, I only had energy to through it all back in boxes, and stuff it all back into the "Holiday Closet". Then came this year. The epitome of Grandmother Nesting. I've had grand babies before, and gone through Grandmother Nesting. But this time was different. As Christmas drew to a close, we were expecting FIVE grand babies... all within the three months directly following Christmas. So, this was nesting times 5. This would be the year that I could tackle the Holiday Closet. And sure enough. Though it took me several days (in between visiting and holding new babies, and babysitting the other grands), I got 'er done. Woohoo! And I have a huge mound of things that my daughters and daughter-in-laws can rummage through to see if there are any treasures they'd like.

The thing I knew I had to do, to be able to really clean out my Holiday Closet, was to empty it. I had to take out every box, every tree, every trinket, and make a decision whether to donate it or to put it back into the closet. This method works really well for me, because once I have a closet with empty shelves, I am loathe to want to put anything back onto the shelves that isn't something I totally love.
This is a before and after of the part of the closet that goes back and around under the stairs. The picture on the left is scary, and I never even looked back there, because it was too risky. And now, it looks like the pic on the right. I can practically dance my way back there. And don't think I haven't. It makes me so happy to see that floor and empty space, that I do feel like dancing when I'm in that closet.


The thing I knew I had to do, to be able to really clean out my Holiday Closet, was to empty it. I had to take out every box, every tree, every trinket, and make a decision whether to donate it or to put it back into the closet. This method works really well for me, because once I have a closet with empty shelves, I am loathe to want to put anything back onto the shelves that isn't something I totally love.
This is a before and after of the part of the closet that goes back and around under the stairs. The picture on the left is scary, and I never even looked back there, because it was too risky. And now, it looks like the pic on the right. I can practically dance my way back there. And don't think I haven't. It makes me so happy to see that floor and empty space, that I do feel like dancing when I'm in that closet.
And these photos below are of the same space, too.
You may have the thought that I still have too much Christmas stuff, and I probably do. But I have about half as much as I did have, and what you see in the photos are keepers, to me. Maybe I'll feel different next time I have Grandmother Nesting, and I'll go through another purge. But for now, I'm completely happy with what I've got going on. Completely.
The green tags you see on the boxes, just meant that I had gone through them. I can take the tags off now that everything has been done. Whew. Now, about those Halloween decorations...
Tuesday, January 13, 2015
January Week 2: Detergents and Cleansers
This week's food storage items are:
January Week 2: Detergents, bleach, cleansers, laundry detergent, dish detergent, bathroom and window cleaners

Some detergents and cleansers have expiration dates on them and some don't. Either way, I would rotate through them just to keep them fresh.
First, you will need to determine which cleansers you want to keep on your shelves. You can't believe how handy it is to have a good supply to fall back on. Decide what you use, and what you will need in the coming year. You can just keep some of the very basics, like bleach, Comet, and Lysol, or you can really take stock and get a year's supply of all of the cleansers you use in a year. I started by just storing two or three different items, but now I get most of what I'll use in a year. It's nice to pick it up in bulk at Costco, or get the items at a case lot sale (which, by the way, they have going on right now at Harmon's).
After you've determined how much you want in your storage, make a shopping list and in the next day or two, go out and pick up the items. Bring them home, get them on your shelves, and update your inventory sheets. Done. It's as easy as that. It literally only takes minutes to do this every week, and in a year's time, you will have a great stock of items that your family actually uses. This is what I love about this system. It's a rotating one, so you have very little (or no) waste along the way.
As a guideline, I've included a list below from Real Simple that includes some expiration dates for regular household items, including cleansers. I think some of the dates are on the conservative side, as I've used some of the items well after the time shown below, and they've still been fine.
January Week 2: Detergents, bleach, cleansers, laundry detergent, dish detergent, bathroom and window cleaners
First, you will need to determine which cleansers you want to keep on your shelves. You can't believe how handy it is to have a good supply to fall back on. Decide what you use, and what you will need in the coming year. You can just keep some of the very basics, like bleach, Comet, and Lysol, or you can really take stock and get a year's supply of all of the cleansers you use in a year. I started by just storing two or three different items, but now I get most of what I'll use in a year. It's nice to pick it up in bulk at Costco, or get the items at a case lot sale (which, by the way, they have going on right now at Harmon's).
After you've determined how much you want in your storage, make a shopping list and in the next day or two, go out and pick up the items. Bring them home, get them on your shelves, and update your inventory sheets. Done. It's as easy as that. It literally only takes minutes to do this every week, and in a year's time, you will have a great stock of items that your family actually uses. This is what I love about this system. It's a rotating one, so you have very little (or no) waste along the way.
As a guideline, I've included a list below from Real Simple that includes some expiration dates for regular household items, including cleansers. I think some of the dates are on the conservative side, as I've used some of the items well after the time shown below, and they've still been fine.
Air freshener, aerosol
2 years
Antifreeze, premixed
1 to 5 years
Antifreeze, concentrate
Indefinite
Batteries, alkaline
7 years
Batteries, lithium
10 years
Bleach
3 to 6 months
Dish detergent, liquid or powdered
1 year
Fire extinguisher, rechargeable
Service or replace every 6 years
Fire extinguisher, nonrechargeable
12 years
Laundry detergent, liquid or powdered
Unopened: 9 months to 1 year
Opened: 6 months
Metal polish (silver, copper, brass)
At least 3 years
Miracle Gro, liquid
Opened: 3 to 8 years
Miracle Gro, liquid, water-soluble
Indefinite
Motor oil
Unopened: 2 to 5 years
Opened: 3 months
Mr. Clean
2 years
Paint
Unopened: Up to 10 years
Opened: 2 to 5 years
Spray paint
2 to 3 years
Windex
2 years
Wood polish (Pledge)
2 years
Subscribe to:
Posts (Atom)