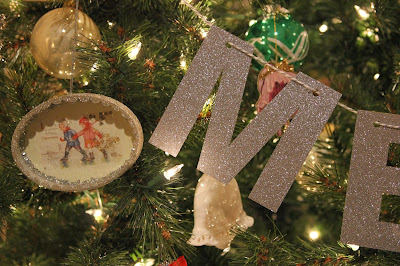
Did you see the Christmas Pottery Barn catalog this year? They had some great holiday decor, as usual. One of the things that caught my eye was this "Merry Christmas" garland for the tree.
My tree is (and always will be) full to the brim with ornaments from years past... from the earliest years of our marriage (when I made the ornaments because we didn't have extra money to spend on ornaments), to the "store bought" years (when I was busy with four kids within five years), to the present years (when I buy some, and make some, depending on the year). Every year, we've added a new ornament to the mix, including one for each of the kids. Somewhere on the ornament, I've written the year, so that we know which year the ornaments were added to the collection. And when the kids have gotten married, I give them their box of ornaments -- one for each year -- with their names and dates on them. And one day they may be able to use them on their trees. It makes decorating the tree very nostalgic and fun!
I always do some sort of garland tucked around the ornaments, but I was getting ready for a change from the one I've been using for the past few years. The Pottery Barn garland was exactly what I was looking for! I saw it in the magazine, took a day or two to think about it, and then by the time I went back to it, it was sold out. Soooo, I looked again and realized it would be pretty simple to make on my own.
I bought a package of chipboard from Joann Fabric. The chipboard I bought was plain and uncut, but I know you can buy chipboard letters that are already cut out, so that would be an option, too. In my case, I had Bob use his magic laser-cutting machine, and he cut my block letters out to be about 4-1/2" tall.
I punched out all of the letters.
I was worried about what to punch the holes with. I didn't know if the chipboard would be too thick to use a regular hole-puncher, but I was able to do it easily with my old hand hole-puncher. I punched holes in the top of each letter so I could string the baker's twine through it later on.
Now, for the glittering. I have glittered more than my share of items before (think back on the parade float). I know that glitter gets everywhere. When we did the parade float, we used Elmer's Glue, painted it on the item, and then doused the thing in glitter. And the finished product was glittery and beautiful. But, I had a lot of letters to be done, and I didn't want it to take all day.
So, I decided to use glitter spray instead. Krylon Glitter Blast, to be exact.
It is so much cleaner and easier to use than gluing glitter. I coated all the letters with just two coats, and they turned out perfect! And there wasn't much of a mess left, either. Soooooo much easier!
I know this kind of a tree isn't for everyone. But I love how I can walk by and see an ornament made from a paint stick that my son made when he was six years old, or the little fabric ornaments from a pattern my mom's good friend gave me when she was going through her craft supply -- years and years ago. I also have beautiful ornaments that friends and family have given me through the years, and I love all of them hanging together -- the humble little hand-made ones from 29 years ago hanging proudly right next to lovely collectibles.
Yes, its a tree full of memories. Oh, and I'm sure to put the ones that won't get broken near the bottom. If you look closely at the photo below, on the little light blue present, you'll see a little red wooden block ornament that my little grand-baby was inspecting the other day. I left it right where he left it for future inspections. ;)


What a wonderful family. You and Bob are so great for each other. If every marriage could be like yours it would be a celestial world. I love your great fun ideas. I love you
ReplyDeleteMom