The year is coming to an end. We've already covered four weeks in December, and since we only do four weeks each month, we're done for the year, and we'll resume again in a week. In the meantime, I use the four "extra" weeks that come throughout the year as time to catch up on any weeks I haven't quite finished yet, or I straighten and organize my food storage closet and/or shelves.
Remember that this food storage plan doesn't really ever end. It is important to check, rotate and replenish every week so that you are actually using the food in your storage. Otherwise you will end up having lots of expired food that you end up throwing away, which is aggravating and wasteful. And, no matter what week it is in the year, you can jump on board and start wherever you are... January, June, November. It's all the same, and you just start right in, beginning with the current month.
We'll have a new week's assignment next week, and in a couple of weeks, we'll continue on with our 72-hour kits. Click the 72-hour kit above to see the information we've covered so far.

Tuesday, December 30, 2014
Saturday, December 27, 2014
Recipe: Ham Roll-Up Appetizers
Sometimes you just need a quick appetizer that you can fix a few hours before the party, and be done with it. I love a hot appetizer, but that can get tricky as you're getting ready for the guests to arrive. On Sunday we had our big annual family Christmas party. I had seen a ham roll-up on line, but there was no recipe, so I decided to go it on my own.
Ham Roll-Up Appetizers
To make 100 appetizers, you will need:
2 lbs. ham, sliced medium thick for appetizers
2 8 oz cream cheese, softened
seasoning salt
seasoned pepper
onion powder
1 t. lemon juice
2-4 T. milk
2 cans olives, drained
100 appetizer toothpicks
I take my cream cheese out an hour or two before so that it is nice and soft. It helps even more to cut it into chunks or slices and let that sit out on a plate for a bit. When you're ready, beat the cream cheese in a mixer until it is soft and there are no lumps. Add the salt, pepper, onion powder and lemon juice. Continue to mix while scraping the sides. Add milk until you reach the desired consistency, which is like a thick sour cream.
Lay a piece of ham out. Spread the cream cheese mixture on the ham. I like to do it fairly thin. You'll get plenty of cheese in every bite.

Roll the ham up in a tight roll. Take a toothpick, and put it through an olive, and then down through the ham roll. The ham slices will be different depending on the ham that you use, so place the olives so that they are about 1-1/2 inches apart, however many will fit along the ham roll.


When the olives are all placed, slice the ham roll between the olives.

Place on a platter (sorry... no picture of that), cover with plastic wrap and store in the refrigerator until time to serve. Easy peasy.
Ham Roll-Up Appetizers
To make 100 appetizers, you will need:
2 lbs. ham, sliced medium thick for appetizers
2 8 oz cream cheese, softened
seasoning salt
seasoned pepper
onion powder
1 t. lemon juice
2-4 T. milk
2 cans olives, drained
100 appetizer toothpicks
I take my cream cheese out an hour or two before so that it is nice and soft. It helps even more to cut it into chunks or slices and let that sit out on a plate for a bit. When you're ready, beat the cream cheese in a mixer until it is soft and there are no lumps. Add the salt, pepper, onion powder and lemon juice. Continue to mix while scraping the sides. Add milk until you reach the desired consistency, which is like a thick sour cream.
Lay a piece of ham out. Spread the cream cheese mixture on the ham. I like to do it fairly thin. You'll get plenty of cheese in every bite.
Thursday, December 25, 2014

Tuesday, December 23, 2014
December Week 4: Pam Cooking Spray, Shortening
This week's food storage items are:
December Week 4: Pam cooking spray, shortening

If you use Pam (any of the varieties), figure out about what you might use in a year. Of course, this is only an estimate, but you can probably make a pretty educated guess. Do the same with shortening. Once you've come up a with a number for both items, write it on a shopping list, and go out in the next few days and pick up whatever you may need for the year. Once you have the items home, put them on your food storage shelves, and update your inventory sheet to reflect the new numbers.
Now since there are 5-ish weeks in December, next week will be a rest (or catch up) week. And then, we'll start all over again with January. Remember, this is never a job that is completely done. To have a good food storage with little waste, you will be purchasing and rotating constantly. But really, who doesn't have 15 minutes a week to handle that? That literally is all it takes. 15 minutes. Sooooo do-able!
And remember... we started working on the 72-hour kits. In about the middle of January, we'll continue on with the next step. For now, click on the 72-hour kit tab above to see where we are, and to catch up. There is still time, but try to get caught up by January 10 so you're ready for the next step.
If you would like the full info on the Week-By-Week Food Storage Plan, just click on the tab at the top of the page. You can then click on any single week and it will take you to the blogpost that featured that week's items. It also has the information as to how you can get a copy of the weekly schedule as well as the complete inventory sheets.
Monday, December 22, 2014
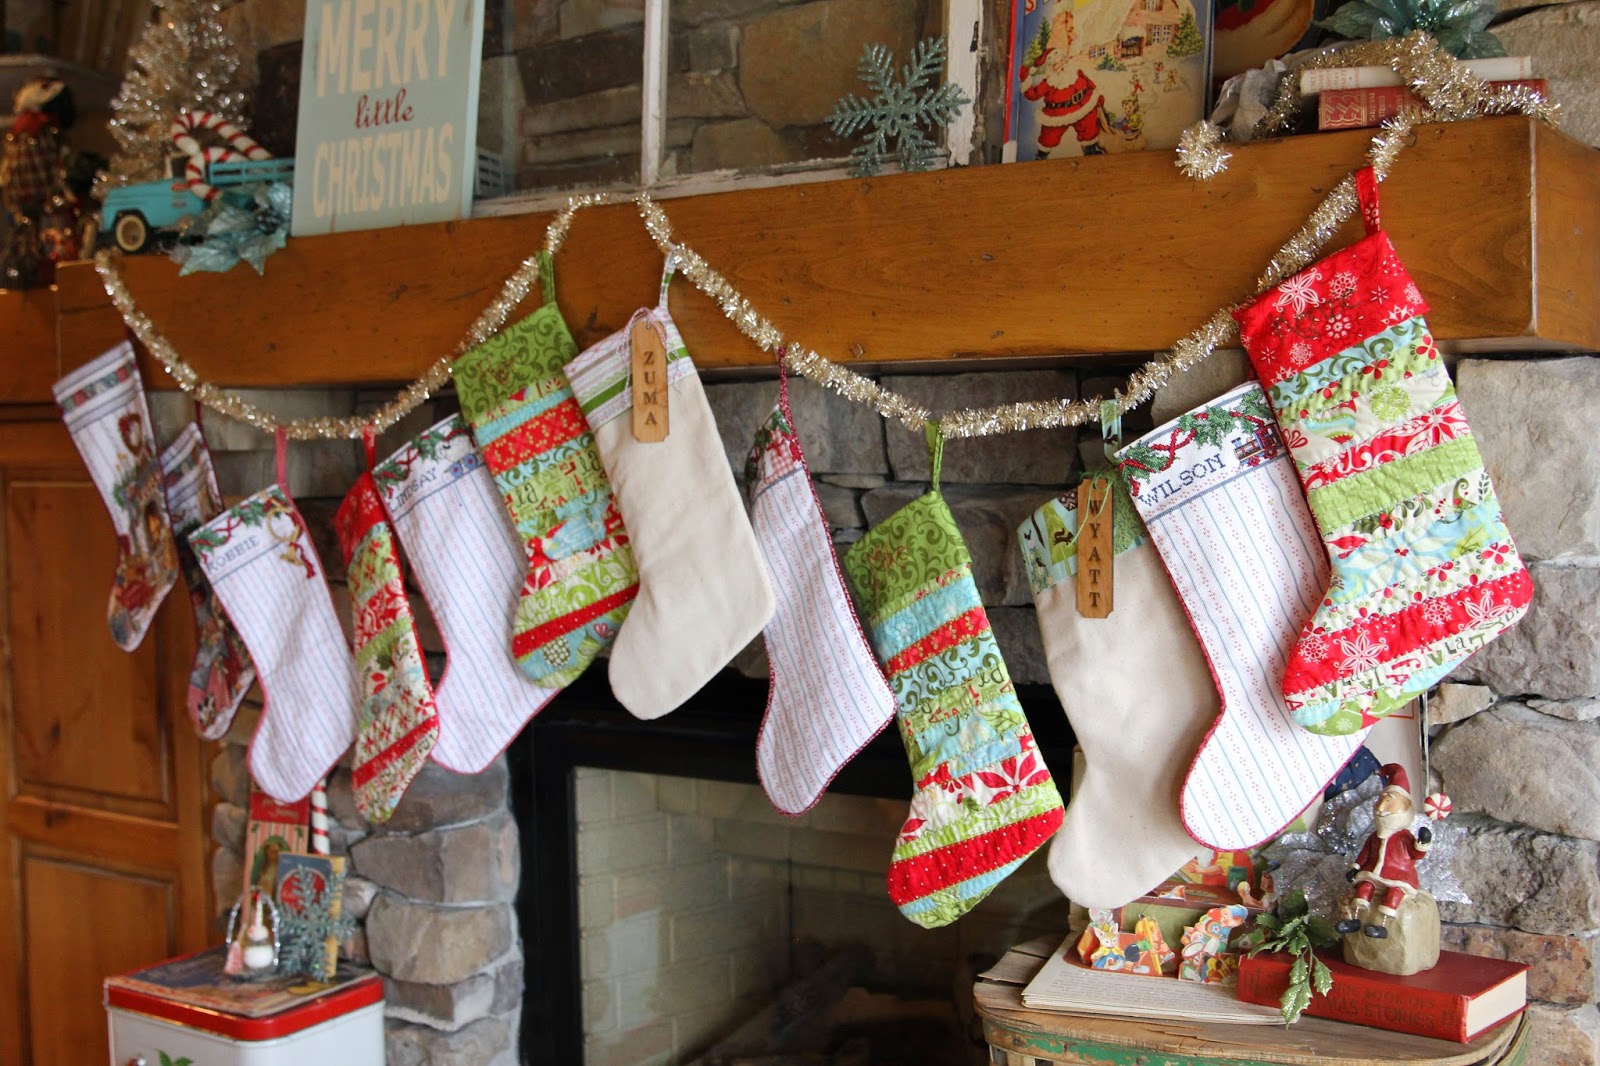
Grandchild Version of Our Christmas Stocking


For the instructions on how to make my scrappy patchwork stockings, click here. My grandkids' version is basically the same stocking, but skipping the patchwork part.
To make these Christmas stockings, I followed a pattern from Moda Bakeshop. The pattern is "His and Her Scrappy Christmas Stockings" by Nicole Willmore. Click here to see the original free pattern.
So, to do the grand kids stockings, the directions are as follows:
I wanted the stockings to be the exact same shape as the others that I already have, so I used my others as a template to draw up my own pattern. Years ago, I made six stockings for my family. As my kids have married, I knew that I wasn't going to go back and cross-stitch stockings for their spouses, so I wanted to come up with something else, and these scrappy stockings fit the bill. I like the idea of having the stockings being a little mix-and-match, so the fact that they are different designs from the originals doesn't bother me a bit. In fact I sort of like it... it seems to represent the phases our family has gone through (first our little family of six, then the four marriages of our kids, and finally, the additions of grand babies to the family).
You may notice the sad shape that my cutting board is in. It has some battle scars from previous projects (which may or may not have involved kids with markers). I have a newer one, but I love this little one that fits in the corner of my counter so well. So, ignore the scars and the marks.
The Moda pattern is great to follow along with. I'll just add a few of my own photos here and some of the changes or adjustments I made. The original pattern makes two stockings. My stockings each measure about 16" long and 9-1/2" wide at the foot of the stocking.
On the Moda ingredient list, you'll notice that it uses a jelly roll. You won't need a jelly roll for my more basic version of the stocking. You will need about 1/2 yard (depending on the size and shape of your stockings) of whatever fabric you'd like the stocking to be made out of. I want all of my grand kids stockings to match, as far as the stocking part. And then, they'll each have a different fabric for the cuff. I chose a nice mid-weight cotton muslin for my stockings.
You will also need a piece of warm and natural that you will cut to just one piece that is exactly the size and shape of your stockings.
Cut four stockings out of the muslin, and one stocking out of the warm and natural batting.

-7 x 13-1/2 (cuff)
-2-1/2 x 6 (hanging loop)
The larger of the two, the cuff piece, may change depending on the size of your stocking. I changed mine from the original pattern.
Stack three of the stocking shapes as follows:
1-warm and natural piece
2-stocking front (one of the four stocking shapes already cut out), with the right side away from the warm and natural
3-stocking back (right side facing the right side of the stocking front)
Pin these three together and sew them together, right sides facing each other.

Sew the other two stocking pieces together (they'll end up being the lining). Be sure to leave about a 2" opening on the long, straight edge of the stocking for turning later. Trim and clip the curves so that the stocking will turn easily, being really careful not to clip the seams.


 |
| this cuff is for a different stocking, but you get the idea... |
I placed the raw edge along the raw edge of the stocking at the top.


I sewed carefully along the top, and then pulled the quilted stocking through the opening of the lining stocking.
Sew along the lining opening to close the hole.
Push the lining stocking down into the quilted stocking, and iron flat.


Thursday, December 18, 2014
Projects Crowding Me Out of My Kitchen
Yesterday, I walked into the kitchen and was struck by the little projects I had going on just about every possible surface. Mind you, I have a craft room, but that is currently being inhabited by another throng of little projects.
I've got vintage key ornaments on-going. We've made over a hundred, and there are still about 40 to go...


I'm also working on Ollie blocks for my two grand babies. Soooooo cute!

When they're all done, I'll post about them.

I've also put together 30 little jars of chocolate almonds for visits my husband will be making in the neighborhood in the next day or two...

And another 15 little Christmas bowls with chocolate almonds. Also for visits he'll be making. (That adds up to lots of visits for him and the other men!)

A little less pretty to look at are the stacks of lesson binders I'm working on to get ready for the new year in Primary.

And of course, quilts to bind.

It's fun to work on these projects and also fun to see them go out the door! The two boxes of chocolate almond treats went out the door last night, and I have reclaimed many, many square feet of counter space. My goal is to keep that bit of real estate empty.
Only one week left til Christmas! Can you believe it?! It's been a wonderful December so far. So full of things that have helped to remind me of the true meaning of Christmas. I love the Christmas plays, programs, ward party, music, books, conversations, etc, that help to keep my thoughts and feelings centered on the birth of Jesus Christ. What a beautiful, simple event that made so much possible for each of us. How blessed we are!
Tuesday, December 16, 2014
December Week 3: Hand-crank radio
This week's emergency prep item is:
December Week 3: Hand-crank radio

This is one of those great weeks where once you've got the item, it's done. Next year, when this week comes up again, you shouldn't have to rotate it or refill it. That's why I've put it on week 3 of December. I figured you just may have other things to do that week. :)
There are several different types and price-ranges out there. I obviously haven't tried them all, so I can only go by what I've got for my own emergency supply. I already had a Voyager Dynamo & Solar V1 Radio. It can be powered by battery, solar power, and/or by hand-cranking. It also has a bright LED flashlight. This year I bought another one that is a bit larger, and can also charge a cell phone. So, I'll keep one with my 72-hour kit, and the other in my emergency supply closet.
The smaller one (shown in the above photo) was about $30.00.
The specs are as follows:
Solar / hand-cranking powered radio flashlight with a USB outlet for your electronic devices. The compact Voyager V1™ radio offers multiple benefits all bundled together. Get standard AM/FM stations as well as shortwave bands to receive stations from around the world. The built-in flashlight add additional convenience and functionality. A USB outlet powers many handheld electronics like most smart phones (does NOT charge Apple devices).
Radio dimensions: 13 x 6 x 5 cm
The Voyager V1 can be powered by multiple sources. You can recharge an internal Ni-MH battery via the built-in solar panel OR cranking dynamo. The battery can also be recharged by a USB outlet using a mini-USB to standard USB cable (not included). The V1 can also be powered by 3 standard AAA batteries.

For the larger one, which was $45.00 on sale, the specs are:
This radio is durable, yet lightweight with a rubberized body that is water resistant<./li>
NOAA stands for National Oceanic and Atmospheric Administration
When using the NOAA Weather Alert, it is recommended that the radio is plugged into a power source through the USB Port (In) or AC Adapter 3.5 mm jack (AC adapter not included)
One minute of winding will give roughly 12 minutes of radio play
The optional AA batteries cannot be recharged in the radio, only the internal Ni-MH battery is rechargeable.
6 ways to power the Radio: Hand Crank Dynamo, Solar Panel, USB Power In, AC Power In, 3 AA Batteries, Built-in Rechargeable Ni-MH Battery.
Red or Green LED lights on the front of the radio indicate when the radio is on or when the batteries are low
3 lighting options: 5 LED reading lamp lights (under solar panel), white LED light, flashlight red S.O.S. LED for emergencies
- See more at: http://beprepared.com/kaito-black-voyager.html#sthash.5i0IkbVt.dpuf
Weight: 1.22 lbs. (19.5 oz.) Dimensions: 5.5” high x 8” wide x 2” thick Radio Size: 8” x 5” x 2.6” Radio Ports:
I'm sure there are many different hand-crank radios on the market. It would be smart to do some research and find the one that best suits your needs.
After I got mine and saw what a nice small size it is, I thought it would be a great idea for stocking stuffers for my married kids. Hmmmm.
Once you've acquired your hand-crank radio, update your Inventory Sheets and then sit back and relax and enjoy your holiday. Remember, this is a week-by-week plan, so you can jump in whenever. I received an email from a reader last week asking if it started in January, and though the lists do go from January through December, you can start the plan anytime throughout the year without having to back up and "make up for lost time". It really is an easy, manageable plan that is completely do-able even for the busiest families. You can adjust it to your needs as your family's size changes. We have adjusted through the years quite easily. As you adjust and buy more or less what your family really uses in a year (and rotate, as planned), you will have less waste at the end of the year. Yay!
If you would like the full info on the Week-By-Week Food Storage Plan, just click on the tab at the top of the page. You can then click on any single week and it will take you to the blogpost that featured that week's items. It also has the information as to how you can get a copy of the weekly schedule as well as the complete inventory sheets.
December Week 3: Hand-crank radio

There are several different types and price-ranges out there. I obviously haven't tried them all, so I can only go by what I've got for my own emergency supply. I already had a Voyager Dynamo & Solar V1 Radio. It can be powered by battery, solar power, and/or by hand-cranking. It also has a bright LED flashlight. This year I bought another one that is a bit larger, and can also charge a cell phone. So, I'll keep one with my 72-hour kit, and the other in my emergency supply closet.
The smaller one (shown in the above photo) was about $30.00.
The specs are as follows:
Solar / hand-cranking powered radio flashlight with a USB outlet for your electronic devices. The compact Voyager V1™ radio offers multiple benefits all bundled together. Get standard AM/FM stations as well as shortwave bands to receive stations from around the world. The built-in flashlight add additional convenience and functionality. A USB outlet powers many handheld electronics like most smart phones (does NOT charge Apple devices).
Radio dimensions: 13 x 6 x 5 cm
- 1 Minute of cranking powers up to 15 minutes of radio listening or 1 hour of light
- A built-in USB port lets you charge your small USB-rechargeable device like smart phones (Does NOT charge apple products)
- Bands include AM/FM, and Shortwave
- Super-bright, 3-LED flashlight
- Built in HD speaker and earphone jack
The Voyager V1 can be powered by multiple sources. You can recharge an internal Ni-MH battery via the built-in solar panel OR cranking dynamo. The battery can also be recharged by a USB outlet using a mini-USB to standard USB cable (not included). The V1 can also be powered by 3 standard AAA batteries.
And this is the larger one:
For the larger one, which was $45.00 on sale, the specs are:
Weight: 1.22 lbs. (19.5 oz.) Dimensions: 5.5” high x 8” wide x 2” thick Radio Size: 8” x 5” x 2.6” Radio Ports:
- Earphone Jack
- USB Port Charge Out (Many cellphones, mp3 player, etc.) Charge Built-in Battery
- AC Adapter 3.5 mm Jack (adapter sold separately)
- AM: 520-1710 KHz
- FM: 87.00-108.00 MHz
- SW1: 3.20-9.00 MHz
- SW2: 9.00-22.00 MHz
- Weather Band: 7 Pre-set Channels
I'm sure there are many different hand-crank radios on the market. It would be smart to do some research and find the one that best suits your needs.
After I got mine and saw what a nice small size it is, I thought it would be a great idea for stocking stuffers for my married kids. Hmmmm.
Once you've acquired your hand-crank radio, update your Inventory Sheets and then sit back and relax and enjoy your holiday. Remember, this is a week-by-week plan, so you can jump in whenever. I received an email from a reader last week asking if it started in January, and though the lists do go from January through December, you can start the plan anytime throughout the year without having to back up and "make up for lost time". It really is an easy, manageable plan that is completely do-able even for the busiest families. You can adjust it to your needs as your family's size changes. We have adjusted through the years quite easily. As you adjust and buy more or less what your family really uses in a year (and rotate, as planned), you will have less waste at the end of the year. Yay!
If you would like the full info on the Week-By-Week Food Storage Plan, just click on the tab at the top of the page. You can then click on any single week and it will take you to the blogpost that featured that week's items. It also has the information as to how you can get a copy of the weekly schedule as well as the complete inventory sheets.
Saturday, December 13, 2014
Thursday, December 11, 2014
Christmas Tags From Vintage Cards
Boy, oh boy. Do you know that feeling when you find a treasure at an antique or thrift store, and you can't believe your luck? My sister and I scored some very vintage scrapbooks a few months back. We've seen empty ones before, but these were full to the brim of vintage cards -- for all seasons and holidays!
I bought two of them and set them aside, just waiting til I had some time to actually do something with them. And I found the perfect reason to pull them out last week. I needed some Christmas gift tags, but not just anything would do. I had made some decorated bottle brush trees, and I wanted a tag that would "fit" the style.
Enter Scrapbook #1:


They're chalk-full of vintage Christmas cards. And since they aren't to or from anyone I know, I don't feel too bad re-purposing them for gift tags.

I imagine whoever took the time to put all the cards in the book, would get a kick out of knowing that 70 years later, they are being put to use yet again.


They could not be any cuter!


I had a hard time choosing which card I wanted to use, but I finally found one I thought would work. I cut the card away from the book, leaving only the glued-on back page of the card.

And this is what the card looked like.

I suppose you could just cut a shape out of the card, and use it without any other backing, but I wanted it to be a bit stouter, so I simply used a glue stick to glue a plain tag to the back of the card, being careful to hold it up to the light so that I could see through it and know I was gluing it right where I wanted it.

Then, I cut around the little tag, and punched a hole where the tag's hole was originally.

I got three tags out of one card! Can't beat that. And there are literally hundreds more waiting to be made, when the time comes. So next time you see vintage Christmas cards, or better yet... an old scrapbook, don't pass it by!

I bought two of them and set them aside, just waiting til I had some time to actually do something with them. And I found the perfect reason to pull them out last week. I needed some Christmas gift tags, but not just anything would do. I had made some decorated bottle brush trees, and I wanted a tag that would "fit" the style.
Enter Scrapbook #1:
Just look at these pages.
They're chalk-full of vintage Christmas cards. And since they aren't to or from anyone I know, I don't feel too bad re-purposing them for gift tags.
I imagine whoever took the time to put all the cards in the book, would get a kick out of knowing that 70 years later, they are being put to use yet again.
They could not be any cuter!
I had a hard time choosing which card I wanted to use, but I finally found one I thought would work. I cut the card away from the book, leaving only the glued-on back page of the card.
And this is what the card looked like.
I suppose you could just cut a shape out of the card, and use it without any other backing, but I wanted it to be a bit stouter, so I simply used a glue stick to glue a plain tag to the back of the card, being careful to hold it up to the light so that I could see through it and know I was gluing it right where I wanted it.
Then, I cut around the little tag, and punched a hole where the tag's hole was originally.
I got three tags out of one card! Can't beat that. And there are literally hundreds more waiting to be made, when the time comes. So next time you see vintage Christmas cards, or better yet... an old scrapbook, don't pass it by!
Tuesday, December 9, 2014
December Week 2: Popcorn - microwave and regular kernels
This week's food storage items are:
December Week 2: Popcorn - microwave and regular kernels

You may be wondering... Why popcorn? I've purposely put popcorn in December because it makes it a very easy food storage week (which, for me, is a necessary thing in December). And if you don't really eat popcorn at all in your home, then you're free and easy this week. Which means you can do one of three things: scratch "food storage" off your list for the week, and just do Christmas shopping; or, you can catch up on a previous week that may not have been completed; or, you can take a few minutes to organize your food storage shelves.
Now, if your family eats popcorn, then figure out what you use in a year's time and get to the store and pick up the popcorn. Then, add the popcorn to your food storage shelves, and update your inventory sheets. It's that simple!
Before you completely dismiss popcorn as a food storage item, check out the article included below, from USA Emergency Supply. (to read the entire original article, click on USA Emergency Supply). Note also that popcorn, if stored properly, can last 10-15 years. You can buy it canned, online from food storage warehouses.
"You may have considered popcorn to be junk-food. However, it actually supplies a lot of nutrition and is suggested as a snack by the National Cancer Institute (NCI), the American Dental Association (ADA) and the American Dietetic Association (ADA). Popcorn contains substantial amounts of carbohydrates, fiber, many of the B vitamins, Potassium, Phosphorus, Magnesium, Iron, Zinc, Pantothenic acid, Copper, Manganese, Linoleic acid and all the essential amino acids. And for how inexpensive popcorn is, popcorn will give you very good nutritional bang for the buck in your food storage or every-day eating. It's inexpensive, easy to pop and great fun to eat.
Hints for getting the best popped corn: Don't pop popcorn in butter as the butter will burn before it can get hot enough. Popcorn pops best in temperatures of 400-460 degrees F. If your oil starts to smoke which happens at 500 degrees F, you've got it too hot. Any oil will work. Use enough oil to cover the bottom of the pan. For your health, you should choose a light cooking oil or better yet, skip the oil all together and use an air popper. The movie houses use yellow dyed coconut oil which does a great job of popping the popcorn although there are healthier oils you can use than coconut oil. To see if you have the oil hot enough, drop a couple of kernels into the hot oil. If it's hot enough, they should pop in just a few seconds. If you don't have a popper, any thick bottomed, high walled pan will do. Popcorn can even be easily made in a Dutch oven over a camp fire. When your oil is the right temperature, pour in your popcorn, shaking the pan to cover all the seeds in oil. Do this with the lid on to prevent burns should the hot oil try to splash out of the pan. Using a lid helps the kernels to heat more evenly and keeps the popping corn from flying all over the place. (If you are using a popcorn popper, shaking it isn't necessary because of it's rounded bottom.) As it begins popping, it's important to continue to shake a flat-bottomed pan. This helps any un-popped kernels to settle to the bottom of the pan where they can pop. As soon as you hear the popcorn stop popping, pull the pan off the heat and pour the popcorn into another container. It will burn if you leave it in the hot pan."
If you would like the full info on the Week-By-Week Food Storage Plan, just click on the tab at the top of the page. You can then click on any single week and it will take you to the blogpost that featured that week's items. It also has the information as to how you can get a copy of the weekly schedule as well as the complete inventory sheets.
December Week 2: Popcorn - microwave and regular kernels

Now, if your family eats popcorn, then figure out what you use in a year's time and get to the store and pick up the popcorn. Then, add the popcorn to your food storage shelves, and update your inventory sheets. It's that simple!
Before you completely dismiss popcorn as a food storage item, check out the article included below, from USA Emergency Supply. (to read the entire original article, click on USA Emergency Supply). Note also that popcorn, if stored properly, can last 10-15 years. You can buy it canned, online from food storage warehouses.
"You may have considered popcorn to be junk-food. However, it actually supplies a lot of nutrition and is suggested as a snack by the National Cancer Institute (NCI), the American Dental Association (ADA) and the American Dietetic Association (ADA). Popcorn contains substantial amounts of carbohydrates, fiber, many of the B vitamins, Potassium, Phosphorus, Magnesium, Iron, Zinc, Pantothenic acid, Copper, Manganese, Linoleic acid and all the essential amino acids. And for how inexpensive popcorn is, popcorn will give you very good nutritional bang for the buck in your food storage or every-day eating. It's inexpensive, easy to pop and great fun to eat.
Hints for getting the best popped corn: Don't pop popcorn in butter as the butter will burn before it can get hot enough. Popcorn pops best in temperatures of 400-460 degrees F. If your oil starts to smoke which happens at 500 degrees F, you've got it too hot. Any oil will work. Use enough oil to cover the bottom of the pan. For your health, you should choose a light cooking oil or better yet, skip the oil all together and use an air popper. The movie houses use yellow dyed coconut oil which does a great job of popping the popcorn although there are healthier oils you can use than coconut oil. To see if you have the oil hot enough, drop a couple of kernels into the hot oil. If it's hot enough, they should pop in just a few seconds. If you don't have a popper, any thick bottomed, high walled pan will do. Popcorn can even be easily made in a Dutch oven over a camp fire. When your oil is the right temperature, pour in your popcorn, shaking the pan to cover all the seeds in oil. Do this with the lid on to prevent burns should the hot oil try to splash out of the pan. Using a lid helps the kernels to heat more evenly and keeps the popping corn from flying all over the place. (If you are using a popcorn popper, shaking it isn't necessary because of it's rounded bottom.) As it begins popping, it's important to continue to shake a flat-bottomed pan. This helps any un-popped kernels to settle to the bottom of the pan where they can pop. As soon as you hear the popcorn stop popping, pull the pan off the heat and pour the popcorn into another container. It will burn if you leave it in the hot pan."
If you would like the full info on the Week-By-Week Food Storage Plan, just click on the tab at the top of the page. You can then click on any single week and it will take you to the blogpost that featured that week's items. It also has the information as to how you can get a copy of the weekly schedule as well as the complete inventory sheets.
Saturday, December 6, 2014
Reminder For 72-Hour Kit: Task 4
Just a quick reminder... We're working on Task 4 for the 72-hour kits. I decided we'd take a little longer to gather these items since it's right smack-dab in the middle of the Christmas rush. So.... keep the list of what you need to pick up, and if you're in a store that happens to carry any of the items, buy them. They will likely be on sale this month, so it would be good to pick them up if you can. If you're too busy to think about it, do it in the beginning of January. We'll wrap up Task 4 in the middle of January, so be ready for the next step.
If you'd like to be reminded of Task 4's items, click on the 72-Hour Kit tab above, and click on Task 4.
If you'd like to be reminded of Task 4's items, click on the 72-Hour Kit tab above, and click on Task 4.
Thursday, December 4, 2014
Bottle-Brush Trees: Failure and Success

1. Plan ahead, and be organized.
2. Don't be afraid to say no.
3. Live in the moment. Enjoy it all!
4. Play Christmas music around the house all the live-long day.
5. Be aware of those around me. Serve even in the smallest of ways.
6. Spend a few minutes every day pondering The Living Christ: The Testimony of the Apostles of The Church of Jesus Christ of Latter-day Saints (Click on the title to read it. It's beautiful, poignant, and speaks to my heart) and read from good Christmas books.
7. Cross things off the "to-do" list that are just fluff, and don't need to be done.
8. When I'm busily running around, remind myself what that trip to Costco, or the grocery run, or the stop in at the mall has to do with Christmas. Most of those errands have everything to do with buying/making gifts or preparing food and our home for family gatherings, and thinking about that just helps me keep my head in the right place. It's all good.
8. When I'm busily running around, remind myself what that trip to Costco, or the grocery run, or the stop in at the mall has to do with Christmas. Most of those errands have everything to do with buying/making gifts or preparing food and our home for family gatherings, and thinking about that just helps me keep my head in the right place. It's all good.
At this time of year, especially, it takes real effort to stay focused on the true meaning of Christmas. So many things to do, events to be at, gifts to buy, things to make. But what a gift it is to know and feel that at the heart of all of our celebrating and hustle and bustle, is our love for family, friends, and Jesus Christ. It is truly the most wonderful time of the year!
Moving on to one of the crafts I had planned to make for Christmas. I found these donut cutters at a antique shop in Logan, Utah.

I love the look of them, and as soon as I saw them, I knew they would make a perfect base for the bottle brush trees I had wanted to try. I had seen a few different pins about bleaching and dying bottle brush trees, so I thought I'd give it a whirl. Oh boy.

I soaked the trees in a bleach/water mixture, and when that didn't do anything, I went for straight bleach. I left the trees soaking for 48 hours, and all they did was change to a dingy color of green. I had thrown 2 smaller trees, that were made of a different material, and to my surprise, they actually bleached beautifully. BUT, when they were drying, and I gently fluffed the little piney spikes back out, they all fell out. Bleh. At that point, I threw the whole kit-and-caboodle out in the trash can, and went to WalMart and bought some while bottle brush trees with very little decor on them. They were cheap and already white. I knew I could work with those.

I got to work taking the bows off, and many of the little peg-shaped ornaments. They weren't glued in well, and most of them were cockeyed so that you could see the peg. Not the look I was going for.

Then, I took the bases of of each of the trees. Easy. Just unscrew and gently pull as you do so, and the bases come off. I then ran a bead of hot glue around the top inside of the donut cutter, and held the trees in place until they dried.

The decorating was so much fun. I don't have any pics of the process, because my hands were covered in white snow fluff and hot glue. I had bought a box of odds and ends from vintage glass garlands, so I used those pieces on the trees. I pretty much used up all that I had, but I would have kept on going if I had had more tiny ornaments to work with. As it was, I was making them for my mom and sisters for an event the next day, so I didn't have time to find more ornaments online.

Notice the "snow" all over the table. These trees did shed a bit of their snow, but it was easy to clean up, so it's all good. I tied a tiny card with a teeny tiny candy cane around each one with baker's twine, and Done! A fun and really quick project.
I had enough of the white trees for my sisters and mom, but I ran out of the white, and made a green tree for myself.

Which is actually okay, because I have a lot of white/off-white bottle brush trees.

And there is my newest addition. Sitting as proud as a peacock in a donut cutter. Love it!


Subscribe to:
Posts (Atom)