Friday, November 30, 2012

Lasagna 2 ways: easy skillet or soup

I love making lasagna. I really do like making the sauce and layering all the yummy goodness of pasta, sauce and cheese. The problem is, I don't always have time to make lasagna, and wait for it to cook.

I came across a recipe the other day for a skillet lasagna. Its both easy and quick, so its a good alternative to lasagna on those nights when you just don't have the time for the real thing. The recipe originally comes from Weight Watchers One Pot Cookbook, and has been changed a few times down the line.

The other recipe I have included is a lasagna soup, which is Y.U.M.M.Y. You might notice that I don't use chopped onions or real garlic cloves ever. Ever. I have never been able to get past the crunch of an onion, and too much garlic makes me sickly. So, I always use the powder variety of both of those items, and in small amounts even at that.. You can use the real thing if it pleases you.


Easy Skillet Lasagna
Serves 4

1 can Italian diced tomatoes, drained (can blend up if you don't like tomato chunks in your lasagna)
2 small cans tomato sauce
onion powder to taste
garlic powder to taste
3 basil leaves, chopped
1/4 t. black pepper
1 t. sea salt
6 oz lasagna noodles, broken into thirds and fully cooked
1/2 c. skim ricotta cheese
1/2 c. part skim mozzarella cheese
3 T. Parmesan cheese
2 T. parsley

1. Heat diced tomatoes, tomato sauce, onion powder, garlic powder, basil, salt and pepper in large non stick skillet. Cook mixture until it is all heated up and thickened a bit -- about 5 minutes.

2. Add noodles to skillet and stir into mixture well. Add scoops of ricotta cheese over the noodles; add in mozzarella and Parmesan. Stir in parsley. Cook about 2 more minutes, or until mixture is thick and hot.

3. Serve immediately with hot, crusty bread and green salad.

******************************************************************

Lasagna Soup
Serves 8

Ingredients

for the soup:
1-1/2 lbs ground beef
onion powder to taste
garlic powder to taste
2 t. dried oregano
pinch of crushed red pepper flakes
2 T. tomato paste
1 28 oz can diced tomatoes -- can blend up part or all, if desired
2 bay leaves
6 c. chicken stock
8 oz. mafalda or fusilli pasta
1/2 c. finely chopped fresh basil leaves
salt and freshly ground black pepper, to taste

for the cheese mix:
8 oz. ricotta
1/2 c. grated Parmesan cheese
1/4 t. salt
pinch of freshly ground pepper

have ready separate from the other cheese:
2 c. shredded mozzarella cheese


Preparation

1. Brown ground beef and add to a large pot. Add onion powder, garlic powder, oregano and red pepper flakes and cook over medium heat for 1 minute. Add tomato paste and stir well to incorporate. Cook for 3 to 4 minutes, or until the tomato paste turns a rusty brown color.

2. Add diced tomatoes, bay leaves, and chicken stock. Stir to combine. Bring to a boil and then reduce heat and simmer for 30 minutes. Add uncooked pasta and cook until al dente. Do not over cook or let soup simmer for a long period of time at this point, or the pasta will get mushy. Stir in basil and season to taste with salt and freshly ground black pepper.

3. While the pasta is cooking, prepare the cheese mix. In a small bowl, combine the ricotta, Parmesan, salt, and pepper.

4. To serve, place a dollop of the cheese mix in each soup bowl, sprinkle some of the mozzarella on top and ladle the hot soup over the cheese.

Wednesday, November 28, 2012

Our Christmas tree

I got the Christmas tree decorated today. I had the menfolk bring it upstairs for me on Monday, then spent a couple of hours fluffing the branches up. Yesterday, I got it about 1/3 of the way decorated, but just didn't have enough hours in the day to finish it up.

Bob said he thought it looked just fine with little or no ornaments on... "Less is more, less is more". But, I couldn't stand to not put up as many ornaments as I could fit on the branches. 


Our tree is definitely not an elegant tree. I have ornaments on it from almost 30 years ago. Every year since we were married, I have bought ornaments for that year and dated them. Once we had children, I put each of their names (along with the year) on one of the new ornaments. So, when they are married and on their own, they have a box of ornaments that span through the years -- all dated, and full of memories!

I love those old ornaments made out of paint stirrers and egg cartons and popsicle sticks. Something about those brings back floods of memories!


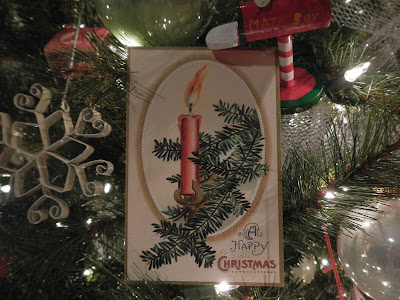
After I hang all of the ornaments, I like to add vintage postcards that I have collected through the years. I tuck them in the branches here and there.


The only thing the tree needs now is a few candy canes on the branches, which will have to wait until my next grocery run.

Now, to move on to other decorating projects!

Monday, November 26, 2012

Tis the Season To Be Jolly Christmas sign

I made a new Christmas sign this year. I had seen (on Pinterest) a printable that I loved, so I got out my Silhouette and made up my own version based on the printable. I cut the vinyl out, and used it as a stencil. I love how it turned out. I gave this one to my mom for her birthday, but I plan on making several more for gifts (and one for myself, too!). Bob and I will be cutting the wood tonight for the rest of the signs.


I like to cover the back in copies of vintage Christmas books and music. The backs of my painted signs never look that great, so its nice to cover them up a bit, and make it decorative at the same time.

On another subject altogether, we made a cabin run (just for the day) on Saturday. We had to meet a repairman up there, so it was a nice excuse to get up in the mountains and enjoy the beautiful crisp clean air. There wasn't quite enough snow to go snow-mobiling, but it was wonderful to be up there for a few hours none-the-less.


Wednesday, November 21, 2012

I love Thanksgiving!


I LOVE Thanksgiving. I love that I don't have to get all crazy decorating for it. As mentioned in an earlier post, I have fall leaves up everywhere in my home, and some years an occasional pilgrim or turkey can be found (in case you're wondering... they can't be found this year, no matter how hard you look). I don't have to scurry around getting lists and lists of things done. I just love a holiday where all you really do is eat amazingly scrumptious food, spend time with some of the people you love most, and think about all of the wonderful things that you've been blessed with. How much better can it get?


Last year we started a tradition of writing in a Thanksgiving Journal that I made. It was really easy to make -- I just used a school notebook and covered it with some copies of my vintage Thanksgiving postcards and paper to match.


Then, each of the family wrote in it about the things they were thankful for that year. It should be fun to read as the years go by and as our family continues to grow.


We were just made aware (through Bob's cousin, Jeana) that the John Alden in this story is related to my husband, and therefore also my kids. He is Bob's 10th great-grandfather. Kindof fun to think about being related to pilgrims. It gives us even more to think about and be grateful for on Thanksgiving!

John Alden and Priscilla Mullins -- one of the earliest romances in the American colonies by David Johnson.
Immortalized by Henry Wadsworth Longfellow's 1858 poem, The Courtship of Miles Standish, John Alden's marriage to Priscilla Mullins was one the earliest romances in the American colonies. While the story is not verifiable, many experts do believe it in fact happened.
Alden and Mullins arrived on the Mayflower in 1630. Shortly thereafter, Standish, "a blunt old captain, a man not of words but of actions," according to Longfellow, took a liking to Mullins, "the loveliest maiden of Plymouth."
However, although Standish was fearless in battle, he was too shy to confront Mullins directly, so he sent his young friend, Alden. The soft-spoken Alden was "Fair-haired, azure-eyed, with delicate Saxon complexion/Having the dew of his youth, and the beauty thereof. . ."
After Alden had pleaded Standish's case, Mullins said, "Why don't you speak for yourself, John?" It was clear that Alden and Mullins were in love, but the couple was afraid of offending Standish. When they received word that the captain had been killed fighting Indians, Alden and Mullins agreed to marry. At the end of the wedding, Standish, who had not been killed after all, appeared, and seeing what had transpired, gave the newlyweds his blessing and asked their forgiveness for his previous behavior.
Alden and Mullins had 11 children and were among the founders of the town of Duxbury, Massachusetts.


Monday, November 19, 2012

Junior's baby shower

We had Whitney's baby shower last week. It was so much fun to see her get some of the things they needed to help them get ready for "Junior". (We all call him Junior, because we don't know the name they have chosen for him... I'm thinking we have called him Junior for so long, the name just might stick.) We ordered the invitations from "Every Making Moment" on Etsy (by Haylee Johnson). She did a fantastic job, and was so easy and great to work with! I love how they turned out!


We stayed with a vintage baby theme, in baby boy colors. It was fun to pull out some of the vintage things I have and enjoy the memories as I was decorating.


I love these new board books that are based on novels! They are darling and simple.


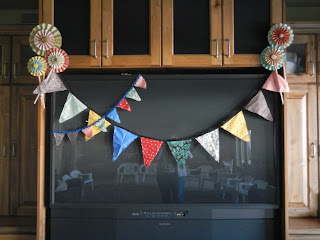
Lindsay made several banners out of cute, bright baby boy colors. I loved them! She gave them to Whitney afterwards, so she could use them in the nursery to decorate.


And some not-so-new books...


And check out this perfect diaper cake! Lindsay made this, too. It could not have been any cuter, and it was packed with things practical things she will use. 


We put the gifts in this vintage bassinet. It has a lot of history. My mom used if for most of her daughters, and I also used it for my four babies. 


I should have taken more photos of the food, but once it was all set up, people started coming, and I didn't have time to take any more photos. We had these individual vegetable cups, along with some other finger foods and lots of desserts provided by Kneaders. I love the individual serving cups... it keeps the dip from getting icky and overused. I've used these for a few different occasions, and I have tried different combinations of vegies. There are so many good vegies you can use.


As the guests left, they each took one of these little favors.


Now if I can just stand to wait two more months til he is born....

Saturday, November 17, 2012

Wedding "Thank You" sign

This morning, I made a little sign for a darling girl in our ward who is getting married in a week. They'll be holding this sign as they pose for photos, and then one of those photos will go out as their Thank You cards. Such a fun idea!

I started with some wood that we had bought to make Christmas signs last year. It was from a 8' by 12" plank. Bob cut them for me to about 18" long. Then, I used a watered down warm brown craft paint to "stain" the wood.


After letting that dry, I painted three coats of a cream-colored craft paint over the whole thing. Then, with my Silhouette, I cut out the letters in vinyl. I looked for a cursive font that would show up, but none of them were chunky enough to show up on the finished product. I love the font. Its a free font called "Santas Sleigh".

After cutting the vinyl, I stuck the vinyl onto the board, and smoothed out the bubbles. Then, I used a little picking tool, and pulled out the vinyl letters, which left the blank letter spots surrounded by vinyl. This is where you have to be pretty meticulous, and not be too rushed. I smoothed out the bubbles again, and made sure everything was nice and pressed down. Then, I got the black paint and using a dry foam brush, dabbed small, dryish amounts over all of the areas where the vinyl letters had been pulled out. It took about four coats of dabbing like that -- with very little paint and a very dry brush -- to make sure the letters were filled in solid.

When it was all dry, I pulled the remaining vinyl off, and was left with something like this:


To finish if off, I ran my sander all around the edges, and a little here and there along the face of the sign, just to give it a little depth and character.

Done! And another item crossed off the list! I can't wait for the wedding festivities. The bride and her family are absolutely lovely, so I know it will be a wonderful affair!

Thursday, November 15, 2012

BYU Choir flash mob

There is nothing like starting the day off with something majestic and beautiful. I LOVED this video! With this at the beginning of my day, it can't help but be a great day!


Monday, November 12, 2012

Pumpkin cookies with cream cheese frosting

I know this is a very unpopular thing to even think, let alone say outloud, but I do not like pumpkin pie. I do however, like pumpkin bread and pumpkin cookies, so I try to find some yummy recipes in those areas so my family won't completely miss out on pumpkin desserts.

I found a definite keeper recipe for pumpkin cookies with cream cheese frosting. They are so good! I found a couple of different recipes on line, and added and tweaked til I came up with this version.

Pumpkin Cookies with Cream Cheese Frosting
Makes 72 cookies

Cookie Ingredients:

1 c. shortening
3 c. sugar
2 eggs
1 large can pumpkin (30 oz)
1 t. vanilla
5 c. flour
2 t. cinnamon
2 t. nutmeg
2 t. baking soda
1 t. baking powder
1 t. salt

***************

Frosting Ingredients:

2 (8 oz) pkgs cream cheese, softened
1/2 c. butter, softened
2 c. powdered sugar
1 t. vanilla
mini chocolate chips

Before making the cookies, take the cream cheese and butter, and sit them out in room temperature while you make the cookies. That will get them soft enough to use later on in the frosting.

To make the cookies, cream together shortening, sugar and eggs. Mix in pumpkin. Add vanilla and flour and mix well. Finally, add cinnamon, nutmeg, baking soda, baking powder, and salt and mix until smooth and all mixed in.

Scoop the cookie dough using a 1-3/4 diameter cookie scoop. (Obviously you can make the cookies any size that works for you, but with this size of scoop, the cooking time and the number of cookies is accurate). Place on cookie sheets.


Bake at 350 for 11-1/2 minutes. Let cool while making the cream cheese frosting.


To make the frosting, combine your softened cream cheese and butter in your mixer. Mix in powdered sugar and vanilla til smooth. Spread on cooled cookies. The frosting covers exactly 72 cookies. You don't need tons of frosting on each cookie.


To give it the finishing touch, and just the right amount of chocolate, sprinkle mini chocolate chips over the tops of the cookies.


Enjoy!
Store cookies in refrigerator.

Sunday, November 11, 2012

A blanket of snow

This weekend brought a nice big snowstorm. I know its a bit early yet, as far as the calendar goes, but it definitely looks like winter as far as the eye can see. It is absolutely gorgeous... sparkly fresh snow covering everything in a nice thick blanket. As you can see, I haven't even covered my outdoor furniture yet, to protect it from the weather. Hopefully this old chair can withstand having a bit of snow on it for a few days. We made these chairs about 14 years ago, with some very dear friends. I think we made about 16 chairs in all -- all assembly line style, with all of us rolling up our sleeves and doing our little part of producing them. They have stood up to the years so nicely (partly because I keep the elements off of them... except right now!) I love to think about our friends every time I look our our chairs. Sweet, happy memories.


Friday, November 9, 2012

Chair makeover

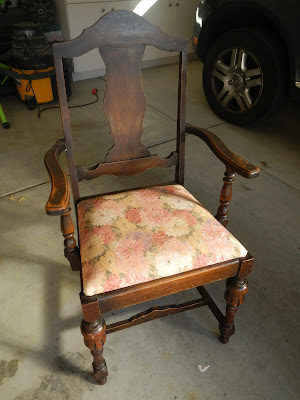
Several months ago, I bought a chair from an antique shop in Logan. I loved the lines, and thought it had great potential. I brought it home and it sat in my laundry room for months. It came in handy for a place to pile anything and everything on. Finally, last week when Bob was out of town on business, I decided it was time to get a few projects done, and the first on the list was "The Chair". I painted it a robin's egg blue color. I LOVE that color. I need to find more things to paint with it.

Before
After

I re-covered the seat (easy peasy) with a beautiful fabric that is gray in the background, and has green, blue and aqua medallions. The walls in my room are gray, so it looks perfect there. So, so nice to have this project done, but I sortof miss my laundry room catch all.

Wednesday, November 7, 2012

Desperate times call for desperate measures

I was feeling a little down last night. Okay, a lot down. I don't want to bring politics into this, but lets just say my guy didn't win. So, I turned the TV off and wondered what I could do to pick my spirits up. Bob wasn't around at the time, and he would usually be the one to do the trick. So, I went for the next best thing...


And guess what! It totally worked! It took my mind off of real life for a couple of hours, and I was whisked away into festive singing and dancing. I so love this movie! One of the top two all-time favorite Christmas movies of mine. I usually don't start watching it until Thanksgiving weekend, but desperate times call for desperate measures.

Tuesday, November 6, 2012

What season is this, really?

We had a workday in the yard on Saturday. I thought that it made sense (since its now November) to get the gardens put to bed for the winter. I wanted to get everything cut back, cleaned up, mowed, edged, fertilized, pruned, pulled out, and thrown away. And then I came upon this...


And this...


There are plants out there that are totally confused as to what time of year it is. Everything is budding and looking like its spring. The mums and columbine and irises and daylilies all have new fresh growth growing up from the ground... again, just like its spring! As we were working in the yard, the day became warmer and warmer, and soon it was into the 70's. Really?

I had no trouble cutting back the dead growth, but I couldn't bring myself to do it to plants like the ones in those photos. So, we got 90% of the front yard completely done, and after this coming weekend's snow, I'm sure I'll be cutting back and pulling out the flowers in the above photo... but I think its supposed to be somewhere in the 30's. Hmph. Back to reality.

Monday, November 5, 2012

Converting slides and finding treasures

One of my on-going projects that I have had for about a year now is going through all of my dad's slides and converting them to digital. He has thousands of slides, and each slide has to be done individually, which takes about 2 minutes (per slide). I absolutely LOVE doing it. Its like a treasure hunt, because I literally never know what I'll find on the next slide. Yesterday, I had a chunk of time, so I thought I would start in on another batch. The box had "Grand Canyon - 1959-1966" on it. I converted slide after slide that looked like this:

1966

Lovely photos, but at this point I am really looking for the slides with people in them. I am converting all of them, no matter what they have on them, but it is much more exciting when I find some familiar old faces. While scanning the slides, I number the slide and enter the information on each one on a spreadsheet, so it will be nice and easy in the future to look at that spreadsheet and just pull all the photos that have Grandma and Grandpa in them, or whoever I may want photos of at the time. I've just passed 1200 slides, which doesn't seem like that many, I know. I have so many more to go, but like I said, I love doing it. Just wish I had a bit more time to carve out for it. I'm hoping to get at least one reel done a week from here on in.

Here is why I love doing this project so much.  Just when I was getting a little tired of the Grand Canyon scenery, this one popped up on the computer:

1959

This right here is why I'm doing this project. There is something about a photo like this, of my Grandma and Grandpa, that is absolutely priceless to me. It was a pretty dark photo -- one you wouldn't have been able to see by just looking through the slide. I lightened it up a bit with FotoFlexer. I'm sure a professional could do a better job, but I'm loving this for now!

And then this one appeared...

1959

This one if of my aunts, cousin, and Grandma again (with her pretty little hat). I love this one, too. Such a wonderful time -- dresses, hats and beads.

1959

I couldn't resist throwing this one in. Three of my sisters are in that mix. I love how every one of the kids (except the cutie in the red coat -- one of my sisters) is squinting, and pulling hillarious faces. It makes your eyes water just looking at it. The little one in the blue coat was pretty smart hiding behind the girl in front of her.

It makes me want to dive into a new batch of slides....

Thursday, November 1, 2012

Night-stand makeover

I've had this old bookshelf sitting around that was in one of our daughters' rooms during her teenage years. It had been pretty beat up and had water spots, etc. I was about to toss it into the "Donate" pile, when I spotted some potential for a night-stand in our guest room. 

I sanded it down to get the finish all even (part of a book page had even been "glued" to the top when some sort of spilled liquid had been allowed to dry on it). It wasn't in the prettiest shape.


After I sanded it, I painted a coat of Kilz on it, let it dry, and then painted it in a perfect little celery color. I love it now! It adds just the right amount of color in that little corner of the room.


I've got a couple more pieces of furniture to refinish next week. Always another project or two in the horizon!