Showing posts with label recipes. Show all posts

Thursday, June 18, 2015

Recipe: Chicken Carbonara

I find recipes all the time on Pinterest, and generally I tweak them a bit here and there. I have come across some real keepers. And also some that aren't all that great, and I don't bother keeping the recipe.

This recipe is one I found that originated from jadelouisedesigns.com. We LOVED it, and especially loved that it is a much lower fat version of the other Chicken Carbonara recipes we've seen. Of course I tweaked it just a bit to suit our fancy.


Chicken Carbonara
Serves 6

2 T. butter
3 T. flour
garlic powder
3/4 c. milk
1/4 c. heavy cream
1 c. chicken broth
3/4 c. Parmesan shavings, plus more to sprinkle onto each serving
2 T. parsley
2/3 box bowtie pasta
6 strips of bacon, cooked and diced
2 chicken breasts, seasoned with salt and pepper, cooked, and sliced
1 roma tomato, diced finely

Prep:
1. Cook chicken breasts in oven or on grill. Slice.
2. Cook up bacon and dice.
3. Cook bowtie pasta, rinse with hot water, and set aside while cooking sauce

Sauce:
1. Mix flour and butter over medium heat until thick and smooth, and cooked through. Add a shake of garlic powder.
2. Add milk, heavy cream, and chicken broth to the pan and whisk until smooth.
3. Cook on low until it thickens.
4. Add in Parmesan shavings and parsley. If the sauce gets too thick, add more chicken broth.
5. Add the cooked, drained bowtie pasta.
6. Toss gently to cover the noodles completely.
7. Salt and pepper to taste.
8. Add chicken, bacon, and tomato to the sauce and gently fold in til all covered in sauce.
9. Serve hot with extra Parmesan shavings over the top.

We ate ours with a green salad and crusty rolls. Can't wait to make this one again!

Friday, March 6, 2015

Chocolate Covered Peanut Butter-Filled Cookies

Yummo. We've been having chocolate and peanut butter cravings in our family for a week now, and I've also been thinking about the Disneyland chocolate covered peanut butter sandwich cookies ever since we went last September. So..... I finally decided on Sunday that I needed to take a crack at making them. You can find several variations of the recipe online. And I'm pretty sure you can't go wrong with any of them. 

The method and recipe I came up with is as follows:

Chocolate Covered Peanut Butter Filled Cookies
(Makes 24)

24 graham cracker halves
2 12 oz. packages of Guittard milk chocolate chips
2 T. shortening
2 c. creamy peanut butter
1/2 c. powdered sugar (or more, if you prefer a sweeter peanut butter filling)
1/2 t. vanilla

Melt the chocolate in a double boiler. I actually used a glass heat-proof Pyrex bowl that I was able to fit over a saucepan (without the bottom of the bowl touching the inside bottom of the pan). Fill the bottom of the pan with about an inch of water, and bring it to a boil. Turn the heat off, and place your Pyrex bowl over the warm water. Put the chocolate chips and shortening into the bowl and stir until it is well combined and all of the chocolate is melted, keeping it over the warm pan of water.

Once the chocolate is smooth and melted, using a pastry brush (I use a silicon brush), brush the tops of the graham crackers with a coat of chocolate.


Set aside to cool and harden. You can put it in the fridge for a minute or two to speed up the process. While they are cooling, make the peanut butter filling. Mix the peanut butter, powdered sugar and vanilla until they are well blended and the mixture is smooth. You can do this by hand, or using a mixer. It is easy enough to stir by hand. After mixing, scoop out a ball of peanut butter mixture onto each chocolate-covered graham. I used a 1-1/4" cookie scoop scraped flat, which is about 1-1/2 to 2 Tablespoons of filling. Spread the peanut butter filling over the chocolate. Place back in refrigerator to set up a bit.


Check your chocolate. If it has cooled down, turn the water back on for a bit, and stir the chocolate until it is thin. Once it is ready, turn the heat off. Place a peanut-butter covered graham into the bowl of chocolate. Using a spoon, coat the top with chocolate. Lift the graham out of the bowl with forks, and let the chocolate drip off the graham. Tap your fork gently on the side of the bowl to make sure the excess chocolate has dripped off. 


Place on a piece of parchment paper to harden and cool.


Once the tops have hardened slightly, you can ad some decorative drizzles of the remaining chocolate. I just flung my fork across the pan and let the drizzles go where they may, but you can do whatever your heart desires. You could even use a colored candy coating to drizzle over for a holiday like Christmas or Halloween or St. Patrick's!


Let the chocolate covered deliciousness cool in the refrigerator. These are best eaten cold straight from the fridge.


And enjoy. 

Saturday, December 27, 2014

Recipe: Ham Roll-Up Appetizers

Sometimes you just need a quick appetizer that you can fix a few hours before the party, and be done with it. I love a hot appetizer, but that can get tricky as you're getting ready for the guests to arrive. On Sunday we had our big annual family Christmas party. I had seen a ham roll-up on line, but there was no recipe, so I decided to go it on my own.

Ham Roll-Up Appetizers

To make 100 appetizers, you will need:

2 lbs. ham, sliced medium thick for appetizers
2   8 oz cream cheese, softened
seasoning salt
seasoned pepper
onion powder
1 t. lemon juice
2-4 T. milk
2 cans olives, drained
100 appetizer toothpicks

I take my cream cheese out an hour or two before so that it is nice and soft. It helps even more to cut it into chunks or slices and let that sit out on a plate for a bit. When you're ready, beat the cream cheese in a mixer until it is soft and there are no lumps. Add the salt, pepper, onion powder and lemon juice. Continue to mix while scraping the sides. Add milk until you reach the desired consistency, which is like a thick sour cream.

Lay a piece of ham out. Spread the cream cheese mixture on the ham. I like to do it fairly thin. You'll get plenty of cheese in every bite.


Roll the ham up in a tight roll. Take a toothpick, and put it through an olive, and then down through the ham roll. The ham slices will be different depending on the ham that you use, so place the olives so that they are about 1-1/2 inches apart, however many will fit along the ham roll.


When the olives are all placed, slice the ham roll between the olives.


Place on a platter (sorry... no picture of that), cover with plastic wrap and store in the refrigerator until time to serve. Easy peasy.

Friday, October 17, 2014

Recipe: Apple Chicken Pasta Salad


This is a yummy, hearty salad that makes enough for a good crowd. In fact, I have made it as the main course, served with bread or crusty rolls. It's filling, and has plenty in it to feel like you've had a round meal.

Apple Chicken Pasta Salad

4 c. diced, cooked chicken breast
2 c. halved red grapes
1 20 oz. can pineapple tidbits, drained
2 c. apples, unpeeled and diced
1 package bowtie pasta, cooked

Dressing:
8 oz. Kraft Cole Slaw dressing
1 c. mayonnaise
onion powder to taste
3/4 t. salt
1/8 t. pepper
dash of thyme
pinch of ginger

Cut and combine the first five ingredients in a large bowl. Whisk the dressing ingredients in a separate mixing bowl until smooth and creamy. Pour the dressing over the salad ingredients and fold in until all is combined. Enjoy!


Friday, June 20, 2014

Recipe: Baked Penne Pasta

I love a recipe that I can make one night, split it in half before baking, and throw one of  the pans in the freezer for another time. It is such a help to pull something out of the freezer, thaw it out, and bake it without having to do any of the work. Love, love, love it!

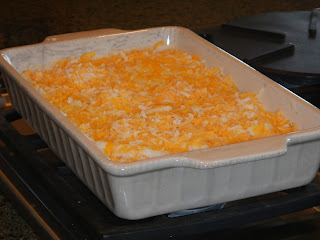
This recipe can work two ways: 1) You can make it in a deep 9x13 pan (or an even larger pan), and serve it all in one night to your family; or, 2) You can make it in two separate 8x8 pans, and freeze one for another time. That works really well for my family. The pasta is yummy and rich and can easily feed 6 people with a smaller, 8x8 pan. So, it's up to you. I show you below how I do it in my two 8x8 pans.


Baked Penne Pasta

1 lb. uncooked penne pasta
1 lb. lean ground beef
onion powder
pepper
garlic powder
seasoning salt
2 (26 oz) jars of spaghetti sauce, any flavor
8 slices provolone cheese
1-1/2 cups sour cream
6 oz. mozzarella cheese, shredded
2 T. Parmesan cheese, grated

Cook penne pasta according to directions on package, until al dente. Don't forget to generously salt the water!

In a large skillet, brown ground beef. Add onion powder, pepper, a dash of seasoning salt, and garlic powder, according to taste. Add spaghetti sauce and simmer 15 minutes.

Preheat the oven to 350 degrees. Spray two 8X8 inch foil baking pans with non-stick cooking spray. Layer the ingredients as follows, in each pan: 1/4 of the penne, 1/4 of the sauce, 4 slices of Provolone, 1/2 of the sour cream, 1/4 penne, 1/4 mozzarella cheese, and 1/4 of sauce mixture. Top with Parmesan cheese and remaining mozzarella cheese.

Bake covered for 30 minutes in the preheated oven, or until cheese is melted. Serve with a tossed green salad and warm crusty bread.

While the one 8X8 pan is baking, I take the other one, and seal it well with saran wrap.


Then, I cover it with aluminum foil, making sure to crimp down all the sides.


At this point, I like to label the dish, so that I know just what it is. I also write the date on the label so I am sure to eat it before it gets freezer burn. Then, I fit the cover that comes with the pans over the whole thing, and I put it in the freezer for another day.


When I want to cook it, I take it out the night before and leave it in the refrigerator. Before I put it in the oven, I take the plastic lid off, as well as the saran wrap underneath the foil, and then I replace the foil, and bake. Sometimes it takes just a few more minutes to cook, but since all the ingredients are already cooked, it really is just making sure it's warm all the way through and the cheese is melted.

(Recipe adapted from sixsistersstuff.com)


Thursday, May 8, 2014

Recipe: Chocolate Marshmallow Brownies

Its high-time to share my favorite brownie recipe ever. Hands down. And it's pretty easy to make, too, which is always a plus.

Marshmallow Brownies

1 c. butter, softened
2 c. sugar
1/3 c. cocoa
4 eggs
1-1/2 c. flour
1 t. salt
2 t. vanilla

1 (10 oz) pkg mini marshmallows

Soften the butter. I usually get the butter out an hour or so before I make the brownies. I chop the butter up in cubes, and let it sit in the mixing bowl until it's soft enough to use. After the butter is soft, add the sugar and cocoa, and mix until all blended in. While mixing, beat in the eggs, adding just one at a time. Add the flour, salt and vanilla.

Spread on a greased cookie sheet (10 X 15 is perfect!). Now, since this batter has a habit of growing up the edges as it cooks, I purposely spread it only til about 1" away from the edges. Then it has room to grow to the edge without making too big of a ridge there. Bake for 25 minutes at 350. Remove from oven.


While still hot, cover the entire top with a package of miniature marshmallows. Return to oven for 3 minutes, until soft and puffy. Cool.


One time, in a pinch, I had to use large marshmallows. I cut them all in half with a kitchen scissor, and laid them all side by side with the cut side down. It worked just fine, so if that's all you have, go ahead and do it that way.


This is what the marshmallow-covered brownies look like when they come out. While it's still screaming hot, I like to take the back of a spoon and push down the high spots and nudge the mallows away from the sides and get it all tidied up and ready for frosting.


Chocolate Frosting:

1/2 c. butter, softened
1/4 c. milk
1 t. vanilla
3 T. cocoa
3 cups powdered sugar

Mix all ingredients until smooth. Spread on top of bars.


This makes just enough frosting to cover the bars sparingly, which turns out to be the perfect amount. There is plenty of gooey, sweet goodness with all of the layers, and any more frosting might just be too much. (If there is such a thing)


Yum. Enjoy.
(Recipe adapted from Six Sisters Stuff)

Friday, April 4, 2014

Recipe: Fruit Salad

The other night, I was asked to bring a salad to an event, and brought this gem. Its a recipe that I've had for years and years, and never fails to please. Its easy, and best of all it is a fruit salad that can be made just about any time of the year. The main fruit in it is apples, so it is a wonderful winter fruit salad as well as any other season! The sauce is thick and yummy!


The recipe is as follows:

Fruit Salad

sauce:
1 small package dry vanilla pudding (cook-type)
1 small package dry tapioca pudding (cook-type)
2 c. orange juice
1 c. pineapple juice

fruit:
any fresh fruit except melons
can use apples, pineapple, grapes, bananas, strawberries, raspberries, etc.)

for a large salad, feeding 12 people, I used
-5 Fuji apples, diced
-2 cups fresh pineapple, cut into small pieces
-2 cups grapes
-3 large bananas, sliced
-1 pint strawberries, sliced

Combine the dry pudding mixes and the orange juice and pineapple juice in a saucepan. Stir over medium heat until the mixture thickens and comes to a boil. Remove from heat and let cool.

Combine all of the fruit in a large bowl. Pour cooled sauce over all the fruit and fold in, to cover all of the fruit. I like to mix my salad up in a large bowl and then pour salad it into a pretty bowl for serving. Enjoy!

Monday, December 23, 2013

Last minute Christmas food, gift-wrapping and gift ideas

Since we're nearly running out of time for Christmas food and preparations and gifts, here are a few super quick ideas...

Santa Hat Fruit Skewers 


All it takes are some long toothpicks or appetizer skewers, green grapes, bananas, strawberries, and string cheese (or as we call them around our house... cheese sticks).  Start with a grape, then a slice of banana (dipped in pineapple juice to preserve color), a strawberry, and then a slice of string cheese for the top of the hat, and to keep everything on. They are darling, festive, and refreshing after eating all the sugary sweets of the season!


Easy, Fun Gift-Wrapping Idea


I just wrapped the gift in brown kraft paper (I actually use painters paper from Home Depot. Cheap and comes on a large roll). Then I wrapped the gift with red and white baker's twine and stuck a few real pine branches in the strings. Add a gift tag (these are my chalkboard gift tags), and you're done! So cute!

Quick Neighbor or Party Gift


We made these for the gifts that Bob gave the ward families this year at tithing settlements. But they would be perfect for a quick neighbor gift or a party favor.

I got my jars at Taipan, but any little jar would do. Tie a red and white piece of baker's twine around it. Have I mentioned I love baker's twine? Have I mentioned I might even have a baker's twine fettish? Okay, maybe another subject for another day. After the baker's twine, I tied a couple of sprigs of greenery (fake pine and something silvery for these) into the baker's twine. Add a free printable gift tag, which are all over Pinterest these days, and throw a little tea light into it, and you're done! Couldn't be easier!

Friday, October 25, 2013

Recipe: Apple Crisp with Homemade Caramel Sauce

We had all of our kids and their spouses (and fiancee), and our grandbaby all over for dinner on Sunday. Can I mention how perfect the world seems when I'm with that group? I can't explain it, but somehow the stars all seem impeccably aligned, and both Bob and I feel like it can't possibly get any better than that feeling right there. I'm pretty sure that's how the family is designed to make us feel.

Well, since we had just come home from our New York trip the day before, I hadn't planned anything really crazy for dinner. We had lasagna, salad, homemade rolls, and then for dessert we had apple crisp with ice cream and homemade caramel sauce. And since this week is "Apple Week" in the Week-By-Week Food Storage Plan, I figured an apple recipe was more than appropriate to share!

I have always loved apple crisp, but as with most things I make, I like it my way. I don't like nuts in my apple crisp. No walnuts, PLEASE! (I know... lots of people love walnuts, but I do not) We grew up with my mom making the yummiest apple crisp. I've taken her recipe, tweaked it just a bit (because I'm an oatmeal lover), and this is what I've come up with...


Apple Crisp

Ingredients:
8 apples, peeled, cored, and sliced in 1/4" slices (I use 4 tart apples, like a Granny Smith, and 4 Fuji's)
1/4 c. sugar stirred with 1/4 c. water to make a syrup
cinnamon
1 cup butter, cut in 1/4 inch slabs
1-3/4 c. white sugar
1/4 t. salt
3/4 c. flour
1 c. oats

Directions:
1. Place apples in a 9 X 13 pan. Dribble your "syrup" over all of the apples. 
2. Sprinkle all over with cinnamon.
3. In a separate bowl, place the butter, 1-3/4 c. sugar, salt, flour and oats. Mix together with a pastry cutter til it resembles small pepples. Place the mixture over the apples, covering evenly and well.
4. Bake in a 325 oven for 45-60 minutes, until golden brown. 

Sometimes I like my apple crisp plain, with no toppings, but when we have company and I want to be fancy, I'll add a scoop of ice cream and sometimes even drizzle warm caramel sauce over the whole thing. Yum. I found a great caramel sauce recipe on Food.com. I like it because it uses ingredients I have in my house all of the time. Plus, its soooo good!

Caramel Sauce

Ingredients:
3/4 c. butter
1-1/2 c. brown sugar
2 T. water
1/4 t. salt
3/4 c. evaporated milk
1 t. vanilla extract

Directions:
1. Combine butter, brown sugar, water, and salt in a medium sauce pan, over medium heat, stirring constantly.
2. Bring to boil for 3 to 5 minutes, depending upon thickness desired.
3. Remove from heat and stir in evaporated milk and vanilla. Serve warm. Keep any unused sauce in an airtight container in the refrigerator.

Thursday, September 26, 2013

Recipe: Apple Cinnamon Grilled Cheese Sandwiches

On Tuesday nights, I have to come up with something that is easy and quick to get on the table. Bob has meetings that sometimes start at 6:00, but can also start as late as 7:00. And sometimes that changes at the very last minute, if someone needs to see him.

So, I'm always looking for good soup recipes that I can keep in the crock pot til needed, or even sandwiches, since they're usually pretty easy to make. And I'm not talking about pb&j sandwiches, though we do have our share of those when things get really hectic.

This past Tuesday was no different than any other. A little crazy. I decided to try the Apple Cinnamon Grilled Cheese Sandwiches from ourbestbites.com. Yummo. I really, really loved them!


Apple Cinnamon Grilled Cheese Sandwiches

Ingredients
8 slices sandwich bread
8 slices cheddar cheese (or use grated)
1-2 apples (I also tried an apple-pear, which was also delicious!)
ground cinnamon
sea salt or kosher salt
3-4 tablespoons real butter
maple syrup

Instructions
Butter each slice of bread and place butter-side down on a cutting board. Place cheese on each slice of bread. Core apples and slice (leave peels on) into 1/8 inch slices. Place apple slices on top of four of the cheese-covered bread slices. Sprinkle them with ground cinnamon and a shake of salt. Place the two halves together (one slice with cheese on it, and one slice with cheese and apples on it). Grill on a hot skillet and cook until each side is golden brown and cheese is melted. Drizzle with maple syrup, or serve syrup on the side for dipping. I drizzled mine, and then decided that for Bob's sandwich, I would serve some on the side for dipping. Both were equally delicious, but I may or may not have ended up feeling a bit sticky after handling my sandwich that had been drizzled with syrup. The dipping method is probably a cleaner way to enjoy these delicious sandwiches.
Makes 4 sandwiches.

Saturday, August 24, 2013

Recipe: Summer Chicken Salad

Since summer is just about over, I thought I'd share one of my favorite summer salad recipes. It just happens to be named Summer Chicken Salad, and tastes suspiciously similar to one served at a favorite soup/salad/sandwich joint around these parts. This salad is sooooo yummy and refreshing!


Summer Chicken Salad
Serves 4

Salad Ingredients:
1 head romaine lettuce, chopped
1 head of red leaf lettuce, chopped
2 c. cooked chicken, diced (I like it cooked ahead of time, and served cold)
a bunch of red grapes, rinsed
10 strawberries, sliced
craisins (dried cranberries)
1/4 c. of cashews, chopped (easiest done in a food processor)

Dressing Ingredients:
6 ripe strawberries
3/4 c. apple cider vinegar
1/2 c. (or more) cup of sugar (to taste)
1/2 t. salt
3/4 c. canola oil
water (to add in at the end if too strong)

Directions:
In a blender, mix up the strawberries, vinegar, sugar and salt. Blend well. With the blender on, slowly add in all of the oil, blending until smooth. Taste. If it seems too strong, add a little water.

To arrange the salads, begin with the lettuce on the plates. Add chicken, grapes, strawberries, craisins, and then the cashews over the whole salad at the end. Serve the dressing separately so that people can add it on their own, as much or as little as they want.

Note: I usually go really heavy on the salad ingredients, and we make this a complete dinner, along with some yummy bread.

Thursday, August 8, 2013

A New Cookie Recipe and A Few Things Crossed Off the List

Whew. Busy, busy. I feel like this has been the busiest summer ever! I've woken up each morning with a long list of to-do's, and by the evening, if I've accomplished half of them, I'm feeling pretty good about myself. Don't get me wrong. It has been a wonderful summer, and we've done lots of things, but it hasn't really been one of those long, lazy summers we used to have when we were kids.

The past few days, I've found a new recipe for cookies that is a definite "keeper", dry-packed a bunch of food storage items with my daughter, made a bunch of Activity Days pool party invitations, shopped for some wedding shower gifts, tended my sweet grand baby (6 months old now!) and tried to get my house ready for some guests this weekend.

First things first. The cookie recipe...


Frosted Banana Cookies (adapted from Sixsistersstuff)
Makes 56 cookies

Ingredients:
1 c. sugar
1/2 c. butter, softened
1/2 c. shortening
1 t. vanilla
2 eggs
1 c. smashed ripe bananas (I used 3 bananas)
1/2 c. milk + 1 t. lemon juice (mix together before adding, or use 1/2 c. buttermilk)
1-1/2 t. baking soda
1/2 t. salt
3-1/4 c. flour
semi-sweet chocolate chips

Directions:
Cream sugar, butter, shortening and vanilla until light and fluffy.
Add bananas and then mix in the eggs.
Blend in the milk/lemon mixture (or buttermilk). Add the dry ingredients until just combined. Do not over-beat. Stir in as much of a bag of chocolate chips as suits your fancy. (The original recipe didn't include chocolate chips, but I think it adds just the right flavor to the cookie when you bit into it. Plus, chocolate makes everything just a little bit better, doesn't it?)
It will be a sticky batter. Drop by tablespoons onto a greased cookie sheet. Bake at 350 degrees for 7-8 minutes, until slightly golden. Cool completely.

Cream Cheese Frosting
(one recipe frosts all of the banana cookies)

Ingredients:
1 (8 oz) pkg cream cheese, softened
1/2 c. butter, softened
1 t. vanilla extract
3 to 4 c. powdered sugar (more or less until it's the consistency you like)

Directions:
Beat cream cheese and butter until light and fluffy. Beat in vanilla. Gradually add powdered sugar until smooth. Spread over cookies. Store covered in the fridge. Yummo.

-------------------------

We have an Activity Days pool party coming up next week, and we thought it would be fun to do a cute, girly invitation. When I saw the pink strawberry soda cans in the grocery store, I thought they'd be just the perfect thing. I made a quick invitation that says "Pop on over", along with all the basics. So easy to throw together with some purple and pink baker's twine to finish them off. 


And this is the season for weddings and showers, isn't it? We've got them lined up for the next month or so, and sometimes it's hard to think of something different to give for a shower gift. This particular one that I'm going to tonight is a "Grocery" shower, which is a really great idea. I decided to give this little conglomeration below..


You can see it all there... a case of cream of chicken soup, a casserole dish, a spatula, dishtowels and dish cloths, and a recipe for Chicken Enchilada Casserole, which includes cream of chicken soup as one of the ingredients.


And lastly, the food storage dry-pack canning. Linds and I went over to the dry-pack and canned the following:

3 cans  of dry pinto beans
2 cans of dry white beans
5 cans of dehydrated apple slices
1 can of dehydrated carrots
1 can of dry onions
4 cans of spaghetti
3 cans of dehydrated refried beans
3 cans of cocoa mix
6 cans of white flour
1 can of red wheat


To be precise, we didn't end up having to can each and every item. They had a few of them on the shelves, so we ended up having to can much less than we expected. It only took us about an hour or so. We actually had a great time and decided we need to have it be a family activity in the near future!

Now, I better get going. Those cans aren't going to get themselves on the food storage shelves. (oh, but wouldn't that be such a nice surprise?)

Friday, July 26, 2013

BBQ Dinner Recipes and Kerplunk Game

We had us some real fun on Pioneer Day! We had a BBQ feast, which included such things as grilled teriyaki chicken, grilled pineapple skewers, grilled zucchini, grilled corn on the cob (lots of grilled things for Bob to keep track of), fruit salad, crab pasta salad, and I believe that's about all we could hold on our plates. I think in all, I tried four new Pinterest recipes, and all four were keepers. Yay! So, I'll share my version of those here. I have no photos of any of the food because it was scarfed to fast. We sat down and literally devoured it all. Which is a good thing. I hate to have a fridge full of leftovers!

First...

5-Star Grilled Teriyaki Chicken (from Six Sisters' Stuff)

1 lb. skinless, boneless chicken breasts
1 cup teriyaki sauce
1/4 c. lemon juice
sprinkle of garlic powder
2 t. sesame oil

Place chicken in bowl, mix the teriyaki sauce, lemon juice, garlic powder and sesame oil in a separate bowl, and then pour over chicken. Make sure all the chicken is coated, cover bowl, and refrigerate for 8-12 hours. Be sure to toss the chicken every couple of hours so that the chicken continues to be coated.

Turn grill to high heat. Place chicken on grill, and discard marinating sauce. Grill chicken for 6-8 minutes on each side, or until juices run clear when chicken is pierced with a fork.


Fruit Salad (from Lilluna.com)

1 medium seedless watermelon, cubed
2 pints of strawberries, sliced
3 c. grapes
1/3 c. dry vanilla pudding mix

Put all of the fruit together in a bowl. Sprinkle pudding mix over the top of everything, and gently stir to coat all pieces. Refrigerate for at least an hour.

The pudding mix works with the juices to make a nice little glaze, and it helps to sweeten the strawberries.


Grilled Corn on the Cob

corn cobs
olive oil
1 cup feta cheese
1/4 c. fresh chopped cilantro
sea salt, to taste
pepper, to taste

Huck and clean corn. Brush olive oil lightly onto the cobs. Mix 1 cup feta cheese, fresh chopped cilantro, sea salt and pepper together and spread on a plate. Place corn on a medium high grill, and grill til the corn seems tender and cooked. When done, roll the cobs in the feta and cilantro mix on the plate, and serve. It was also good to cut the grilled corn off the cobs, then take a scoopful of the feta mixture and mix in with the corn. Yum.


Grilled Caramelized Pineapple (from Six Sisters' Stuff)

fresh pineapple chunks (cut from one pineapple)
1/4 c. brown sugar
1/4 c. butter, melted
1/2 t. cinnamon
1/2 t. vanilla extract
1 T. honey
wooden or metal skewers

Place four pineapple chunks onto each skewer. Mix together brown sugar, butter, cinnamon, vanilla, and honey. Place skewered pineapple on a large pan. Using a brush, glaze each piece of pineapple with the brown sugar mixture.

Place skewers on a medium-high grill. Cook for 5-10 minutes on each side, or just until the sugar-glaze starts to caramelize. Serve warm.


Crab Pasta Salad (from Sugar n' Spicegals)

12 oz. medium shell pasta, cooked
1 pound crab, imitation (shredded with a fork)
1 c. chopped celery
8 eggs (hard-boiled and diced)
1 c. mayonnaise
1 c. sour cream
sprinkle of onion powder
2 t. sugar
salt and pepper to taste

Mix the mayo, sour cream, onion powder, sugar, salt and pepper together till creamy. Set aside. In a large bowl, gently stir the pasta, crab, celery and eggs. Add the mayo and sour cream mixture. Taste to see if it has enough salt and pepper. Refrigerate until you serve.


Giant Kerplunk Game

After we ate, we all retired to play our new giant Kerplunk game that Bob and I built. There are some great instructions on thisoldhouse.com. If you are making one, you'll want to use that as a reference for sure. We changed it up a bit and did things our own way, but it turned out pretty much the same.


Of course we had to test it out before everyone came over, with a first-ever game. It was actually really fun!

We started with our circles (which Bob cut with his laser machine, but the original instructions show you how to do it with a jigsaw). I glued and clamped the wood circles together.


And then it was time to paint them. A couple days after this photo, I got around to spray-painting the legs blue, too. The blue is the bottom ring, and the red is the top.


We bought the coated chicken wire from Home Depot. I wish we could have bought our small chunk that we needed, but we had to buy a whole roll. So, if you are making one of these, come on by for a chunk of chicken wire.


And here are some of my darlings playing the game. We all got into the action, and had a few great rounds.


We got the dowels from Home Depot, also, and just cut them exactly in half. We have gobs of dowels, but it makes it kind of fun to have so many. I got the balls years ago from Target, but picked up some more from Home Depot, so we have tons more than what shows in the photo here.


We're going to take this up to our family reunion, and have some fun with it there, and then I'm sure we'll be using it for Activity Days, Young Women, Scouts, and more family things! This was a great, cheap project!

Once again, Thanks Love, for helping me with yet another project. Now, on to the next one....

Friday, May 31, 2013

Comfort Food: Shepherd's Pie

Sometimes I need to throw all caution to the wind and make something for dinner that is purely a comfort food. This recipe is not going to win any awards for being "low in points, calories, fat or carbs". Its just yummy and easy to love. Its also one of my son's favorite meals. This is the son in particular that has just come home from his two year mission. I can't help but still make his favorites (especially when they're mine, too!)

So.... the other night I made shepherd's pie. This is a basic, no-frills recipe, and there is a really great chance that you have all the ingredients already in your pantry.

Shepherd's Pie
Folks, its obvious I'm not a food photographer
or food blogger.

Shepherd's Pie

1 lb. ground beef
onion powder
10-3/4 oz can of cream of potato soup
1/3 c. milk
1 can green beans
3 c. mashed potatoes
1 c. shredded Cheddar cheese

Brown ground beef in a large skillet, and season with onion powder. Drain off fat and juices and return to heat. Add soup, milk, and green beans to skillet. Mix well. Spoon ground beef mixture into a lightly greased 9X13 casserole dish, and spread out evenly. Spread potatoes on top of beef mixture and sprinkle with cheese. Bake at 350 degrees for 25 minutes, or until cheese is melted. Serves 6.

Saturday, May 11, 2013

Recipe: Seared Chicken with Avocado

Bob and I are trying to eat healthier. I try to find recipes that are light or low-fat and adapt them to our tastes (which usually involves removing the onions and peppers).

I found this great recipe that I made the other night at its one that I'll definitely make again. It was fresh and tangy and satisfying. I paired it with roasted potatoes and green beans.


Seared Chicken with Avocado
(Recipe adapted from the Weight Watchers Five Ingredient 15 Minute Cookbook)


4 skinless, boneless chicken breast halves
seasoning salt
seasoned pepper
1 t. olive oil
1 diced, peeled avocado
2 T. chopped fresh cilantro
2 T. fresh lime juice (about one lime)
1 lime, cut into fourths

Sprinkle seasoning salt and pepper on both sides of chicken. Heat oil in a large nonstick frying pan over high heat. Add chicken. Cook 1 minute on each side, or until it is seared. Reduce heat to medium; cook 5 minutes on each side with lid covering to keep moisture in. If chicken needs more time to cook, turn the heat down to low, keep the lid on, and let it continue cooking.

Combine avocado, cilantro and lime juice. Squeeze lime over chicken before serving. Top with avocado mixture. (My husband doesn't like cilantro, so I added my cilantro to the avocado after I had taken his serving out)

Makes 4 servings

Sunday, April 28, 2013

Recipe: French Dip Crescent Rolls

I have found a great recipe that is quick and yummy! I use the term "recipe" very loosely, as this doesn't really involve mixing any ingredients together... its more of an assembly process, and a quick one at that. We love french dip sandwiches in our home, but they are only really great if the bread is fresh. This recipe solves that problem.


French Dip Crescent Rolls

-One package of regular Pillsbury crescent rolls
-1/2 to 1 lb of sliced roast beef (depends on how "beefy" you want the rolls)
-8 slices of Provolone cheese

Open the crescent rolls and lay them out on a flat surface. Take a slice of roast beef and a slice of Provolone cheese, and roll it up in a small roll. Place the meet and cheese roll on the thick end of a crescent roll triangle. Begin rolling (thickest end first), wrapping the dough around the meat and cheese. Place on a non-stick cookie sheet and bake at 375 degrees for 15-20 minutes.


Serve them warm with au jus. My favorite is Knorr's. 


It is hands-down the best I've had, and I have tried several different recipes and brands. 

I like to serve these little french dip rolls with sweet potato fries and a salad. Its one of those simple meals that everyone loves!