Thursday, March 14, 2013

Snowdrops in full bloom


A few years ago, when we were up in Logan visiting my Aunt Carol, she gave my mom and my sisters and I each a shovel-full of her Snowdrops. I love getting plant starts from people I know and love. Whenever I look at those plants in particular, I think about whoever it was that originally nurtured the plant along so that I, too, could enjoy it in my own yard. I planted my start from Aunt Carol along my front walk, so that they're easy to spot as they poke their heads through the snow and then bloom their sweet little white flowers. They, along with the crocus' are the very first every year to show their cheery little blooms. They are such a welcome sight after a long, cold winter.

Oh, and be sure to notice and love them while they're blooming, because you can blink, and they'll be gone until next year!

Tuesday, March 12, 2013

March Week 2: Mixes - pancake, cake, brownie, Bisquick, muffin

It's that time again! It seems like last week flew right by, but here we are again, talking about the Week-by-Week Food Storage Plan. This week's items are:

March Week 2: Mixes - pancake, cake, brownie, Bisquick, muffin, etc.


These items will vary widely from family to family. For instance, I can't remember the last time I used a cake mix to bake a cake. However, there are a few times a year I might need to make a batch of quick cupcakes or "cake mix cookies". So, for our family, we really only need a handful of cake mixes on the shelves. I use a pancake mix here and there, and I use Bisquick in a cookie recipe that I make fairly often, so I'll make sure I have enough of both of those items.

In an emergency, I could use the pancake mix and the Bisquick to go along with other things in our food storage, so they may come in handy that way, too.

Think about how much of each of these items you might use in the coming year, and try to buy and store those amounts. Be sure that you check the expiration dates of the items you're buying so that you can keep them on your shelves throughout the year. Remember, one of the things that makes this system work is that you will be rotating through and using much of the food. You shouldn't have to discard old, expired food, which is one thing I found myself doing quite a bit of before.

As mentioned in several of these posts, if you're looking at this plan for the first time, the beauty of it is that you can jump right in this week and have this be the start of your year. You don't need to go back and try to catch up on the earlier weeks of this year. Start now, and know that a year from now, you'll have your complete food storage system.

If you would like the full info on the Week-By-Week Food Storage Plan, just click on the tab at the top of the page. It also has the information as to how you can get a copy of the weekly schedule as well as the complete inventory sheets.

Sunday, March 10, 2013

Pruning the Bartlett pear trees


Yesterday was the first day we've had a chance to get out and start our pruning. We pruned the two Bartlett pear trees in the front yard. It may sound strange to have fruit trees in the front yard, but not in our neighborhood. The land we built our home on used to be a big orchard. When we were building our home, we wanted to leave as many of the old fruit trees on our lot as we reasonably could. We ended up only leaving two Bartlett pear trees in the front yard, but we were able to leave 30+ Nashi pear (Asian pear) trees in the backyard. We were able to make a big lawn area in the center of the yard, with the trees surrounding it. We LOVE having those old trees. When they blossom, they put on an absolutely gorgeous show, and the fruit gets picked and eaten by many of our friends and family. In the fall, we start making calls when the fruit is ripe, and people bring their boxes and baskets and pick to their hearts' content for a few weeks.

In the early spring, right about now, it's pruning time. We have managed to keep the trees to a nice height so that for the most part, we can do the pruning from the ground. Once in a while we'll use a ladder or climb up the tree to get some of the branches in the tippy-tops. When our kids were younger, they each were in charge of several of the trees, and would have to keep the area underneath each tree weeded, and also pick up the fallen pears. We marked "their" trees by either tying a certain colored string around the trunks or putting a cute little metal stake at the base of each tree, marked with their names. They still come and help with pruning or yard work here and there. They are all great workers!

We don't spray the trees at all... too many chemicals and too many trees. We get some worms here and there, but for the most part, they don't do too much damage. And the fruit. Oh the fruit. If you're a pear eater, you will think this is the most amazing fruit you've ever eaten. I don't really love pears (go figure), but I do like these. They're a cross between an apple and a pear, so they look much like an apple, but are juicy like a pear. And I do mean juicy when they're really ripe. Like running down your elbows kind of juicy.

So, back to yesterday. We had about an hour, so we thought we'd run out in the front yard and get the two trees pruned out there, to get our feet wet in preparation for the backyard prunings. I remember picking up the sticks as my mom and dad pruned our trees back in the day, and then when we were teenagers, they taught us how to prune, and just where to make the cuts. We sortof took what we learned through the years and applied it to our little orchard here, and the trees seem to like whatever it is we do or don't do for them every year.

I so love this time of year!

How cute is this guy?
It turns out the strongest man
in the world also is an expert pruner.
Who knew?!

Thursday, March 7, 2013

Original DIY Cake Stands

When we had the 50th birthday party, we re-used a project from our daughter's wedding. We had five different cake stands holding five different wedding cakes -- all on a pink dresser.

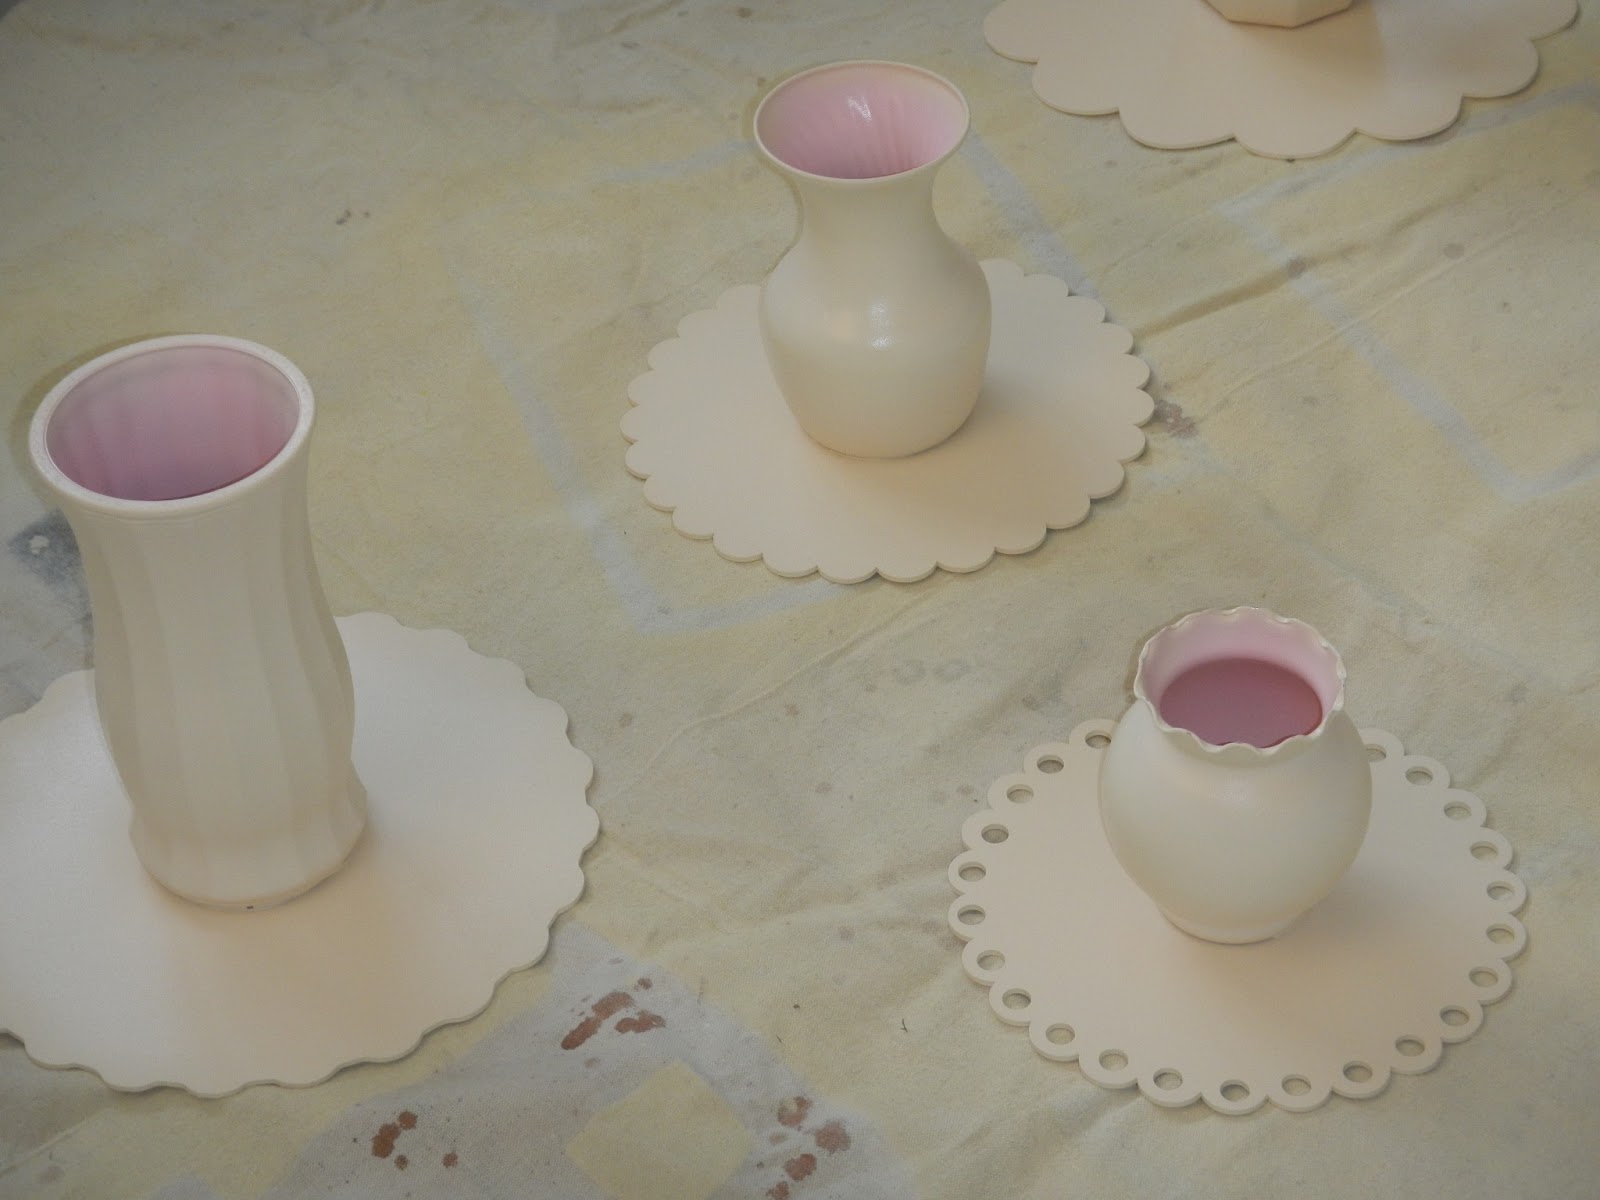
For the birthday party, I knew I was going to serve "Everything Bundt Cakes" for the dessert, and I wanted several different flavors, so I figured it would be so easy to re-use the wedding cake stands. To make the original cake stands, I simply found various glass vases at the thrift store. The vases with broad openings work best. I had Bob cut out some scalloped wood circles of different designs and sizes, and glued the bottom of the vase to the center of a scalloped circle. E-6000 works perfectly for this. Be sure to let it dry overnight.


After they were dry, I laid them on a drop-cloth in the garage, turned them all upside down, and spray painted with a gloss spray paint. These vases below are painted a cream color for the wedding.


After the surfaces are coated really well with the spray paint, and they have completely dried, turn them right side up and spray the top and edges of the scalloped circle. Let them dry well, and Voila! You have some darling, unique cake stands!

For our party, I wanted them all a glossy white, so I re-sprayed them. It started out to be such a quick project. I had them all re-painted and gleaming in no time at all. 


I left them in the garage on the tarp just drying their little hearts out, when Bob and I came thundering into the garage with our car. Oops. Actually, I was quite relieved to find that we had just run over a couple of cake stands When we first felt the car go over something, I had terrible thoughts that it might have been our old cat. Ugh.

So, I just had to re-make two of them. I had two old vases in my cupboards, and it didn't take very long to have those ones completely done and lined up with the others.


They are now put away on the shelves waiting for the next function, for which they might be a completely different color! That's what I love about these... they were so inexpensive and easy to make, that I don't feel bad just spraying coats of paint over and over, to match any decor for any event. I would never do that with the more expensive ones that I have.

Tuesday, March 5, 2013

Week-by-Week Food Storage Plan -- March Week 1: First-aid kit and supplies

This week's food storage item is the following:

March Week 1: First-aid kit, gauze, Q-tips, cotton balls, band-aids, Neosporin, hydrogen peroxide, rubbing alcohol, etc.

I like to do this one in two parts.

First, I have a first aid kit in our bathroom, and this week is the perfect opportunity to update it and replenish it. I have a list taped to the top of the lid (the whole thing is kept in a fishing tackle box, which I love!) and I'll go through and check the contents of the kit with the list, and write anything I need to purchase on my shopping list. By the way, you can get a Plano fishing tackle box on Amazon for about $15.00, and they're perfect for first-aid kits!

First-aid kit in a fishing tackle box

Second, in addition to my first-aid kit, I like to keep some extra things on hand in my emergency supply. I keep Q-tips, cotton balls, extra band-aids, hydrogen peroxide, rubbing alcohol, various sizes of gauze pads, medical face masks, and rubber gloves. I keep most of these items (except the larger things) in a medium-sized container with a lid. It sits on the shelves next to the other items in my emergency supply. This year, when I checked my items for rotating, I noticed that my Neosporin was close to expiring, so I have written that on my shopping list and will get that back on the shelves. Everything else is on the shelf from a year ago, so we're good to go!

First-aid needs will vary from family to family, so as you look at my list, you may want to add or remove items. Store what your family will or may need for the year, as well as some extras that would be beneficial during a long-term emergency.

Let me reiterate that this is a weekly food storage plan that doesn't have any particular order. I like it that way so that I'm working on different things all the time, and building up different areas of my emergency supply. You can jump in on this plan at any given week, and have that be the start of your Week-by-Week Food Storage Plan. You don't need to go back to January and start at the beginning!

If you would like the full info on the Week-By-Week Food Storage Plan, just click on the tab at the top of the page. It also has the information as to how you can get a copy of the weekly schedule as well as the complete inventory sheets.

If you would like a copy of my first-aid kit list, just make the request as a Comment below. Be sure to leave your email address!

Monday, March 4, 2013

The Vintage Market Place in Sunny California

We had a quick getaway last weekend. It all started with The Vintage Marketplace at the Oaks. I had been hearing about these "fairs" for about a year, and had secretly wished I could pop in on one. They happen every few months, and it seemed that every time one came around, there was something that conflicted. This time around, I couldn't see any reason that we couldn't slip away for a few days, sooooooo, I casually asked Bob if he thought there might be a need for him to go to California on business. He has a customer in Southern California (which is where The Vintage Marketplace is held). He replied that he always had a need to go there. So, when I wondered aloud whether a trip in the beginning of March might work, he knew that I must have something up my sleeve. I told him about the fair, and without even blinking, he said, "Let's go!". (I'm not one to love flying, so when a trip is something I actually suggest, he is all over it.) We flew to Orange County and then the next day we drove from our hotel to Rainbow, California, which was probably a little over an hour away. Oh, and just for the record... Bob did meet with his customer on Thursday afternoon, right after we got in to town. 

Friday was really warm. I mean really warm. We had left Utah where it was about 35 degrees, and there we were in Rainbow where it was 85 degrees. It was a gorgeous day!

This little seating area made from old doors was near the entry of The Vintage Marketplace. 


I didn't take very many photos. I was having too much fun looking around. As with the Country Living Fair that we went to a couple of years ago, it was torturous in some ways. There were lots of large furniture items that I would have bought in a second if we had a truck. As it was, I settled on some fun smaller things that we were able to ship home at the handy little postal center across the way from the fair. (Can't wait to get that box!)


Notice the man in the photo below. It is not Bob, but it is proof that there was at least one other man at this event.


What a great sport my sweetie-pie is! He didn't once complain or suggest that we move through the booths faster. If the booth was full of ladies with large purses, he just shimmied out and waited for me on the outskirts of the booth, and then we moved on. It was a perfect day! I could literally spend all day long doing just that, but we saw everything within a couple of hours, and drove back up to Huntington Beach (our old stomping grounds).

We had such a fun time getting away for a few days! There is nothing I would rather do than be on a trip with Bob. We both seem to take life at a pretty fast pace, so its nice to wind down together once in a while!
Saturday, March 2, 2013

Mountains to Climb - Video

I love the beautiful thoughts in this video. Do we not all have really hard things to go through in life? How amazing to know that even the trials can be blessings, and that through faith, we can make it through, having grown and having become better. What a great reminder to be grateful for the blessings that we do have, even amidst the tough times that naturally come to us in this life.